fbpx

What Is A Sky single feed mode?

Sky Remote

There are many types of home entertainment systems that are available in-store for customers with different demands. An average house would set up a hard-wired internet connection, pay for aerial installation services. If you are on a budget, having a TV service installed may be the most affordable entertainment set up.

Installing an entertainment system to your home is one of the many ways to be able to relax and enjoy at your own pace! Whether it’s to share a moment with your family or friends after a long day of work, or binge-watch the recordings of your favourite show alone, you will be pleased to use a well-functioning home entertainment system with Sky!

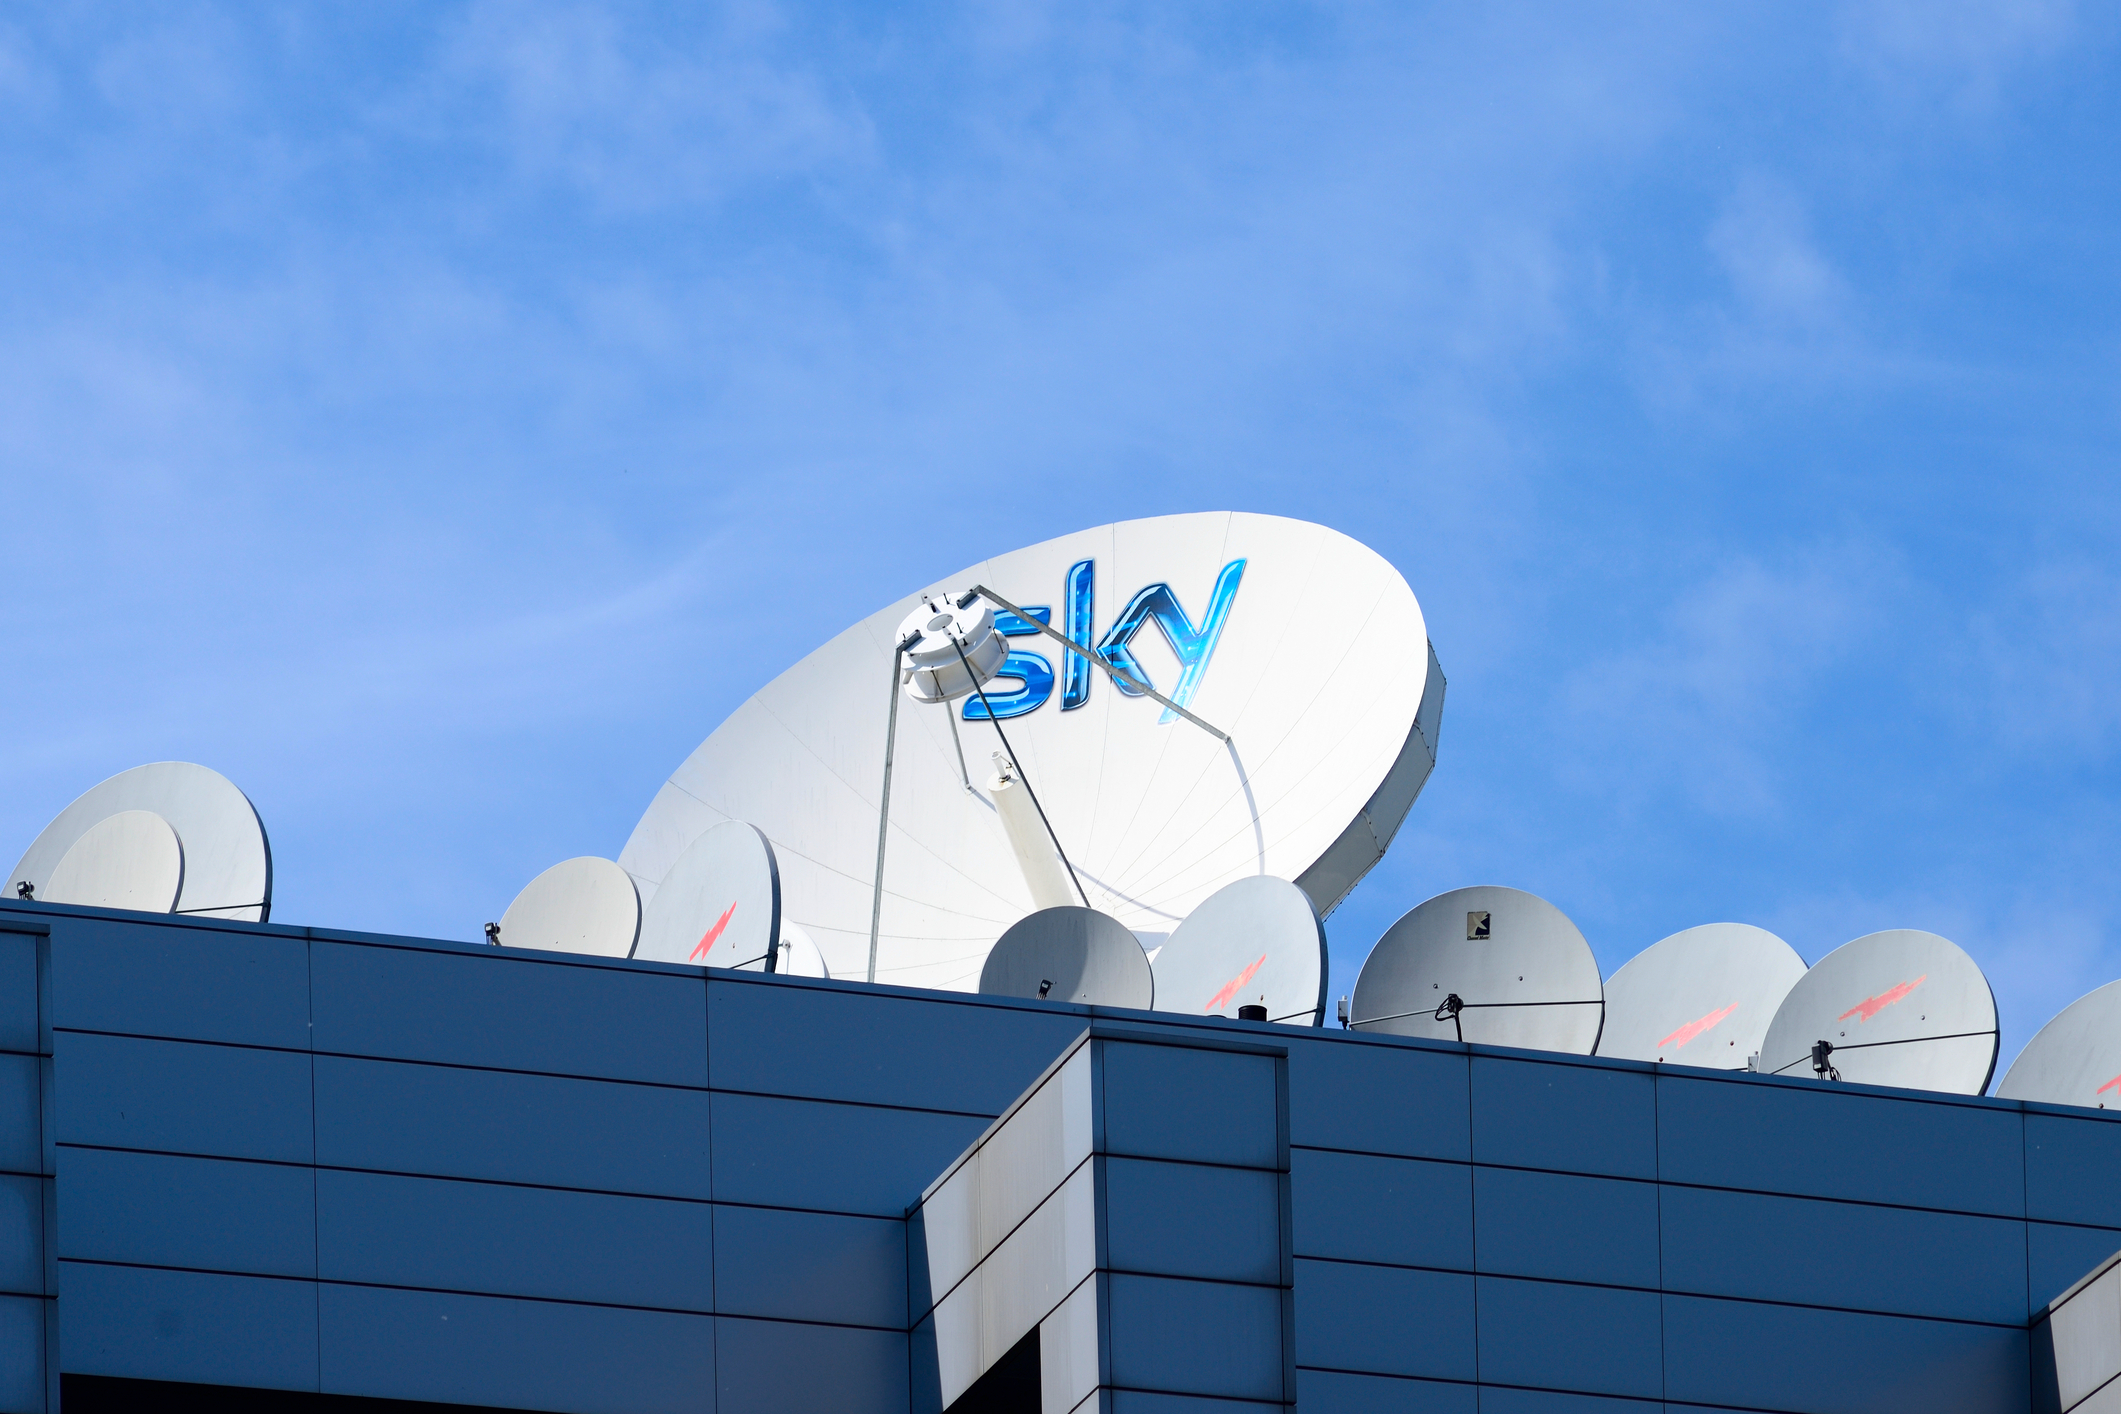
As you choose to have a Sky+ HD box at your flat, there are just some things that you should know and understand when you will only have one single cable to your Sky+ HD box.

  1. What is a Sky Single Feed Mode?
  2. How Do I Change My Sky Box To Single Feed Mode?
  3. Can I connect my Sky box to my home WiFi?

Best CCTV installers and Aerial engineers near you

What is a Sky single feed mode?

Standard Sky boxes usually function using two cable feeds coming directly from your satellite dish. With this, it will allow you to watch a show, and record another one simultaneously. However, some circumstances may not be possible to get a second cable feeding into your Sky+ HD box.

This is where the Sky Single Feed Mode option enters the topic. The Sky Single Feed Mode is one of Sky’s latest updated features on their new Sky+ HD DigiBoxes. It’s a setting on your Sky box that should be set so your leisure time won’t be interrupted with sudden technical issues, or screen error messages. That being said, when you connect your satellite PVR with only one cable, you would not be able to record one program and watch another, or record two programs simultaneously.

The Single Feed Mode is highly useful for communal satellite installation since it can be impossible to have a second cable feeding your Sky+ HD box. It should also be noted the Single Feed Mode option only works for Sky+ HD Box, and not for Sky+ Box. 

How do I change my Sky box to single feed mode?

Here are the simple steps to set your Sky+ HD Box to single feed mode without the help from your technician:

  1. Your Sky cable must be plugged into Dish Input 1, and not Dish Input 2.
  2. Click the ‘Services’ button on your Sky remote control.
  3. On the ‘Services’ screen, press 0, 0, 1, and then press ‘Select‘ button onto your remote control. Doing this will open your Sky installer Menu on the Sky+ HD box.
  4. Once the Sky Installer Menu opens, go to ‘Setup’ and scroll down to ‘Single Feed Mode’ and switch it from ‘Off‘ to ‘On’ and click the green button on your remote control to save the settings.
  5. A warning message will pop out from your screen that will tell you that you are changing to Single Feed Mode.
  6. Press the green button and ‘Select‘ on your Sky remote control to continue.
  7. Just wait for a few minutes as your Sky box restarts. Once done, the single feed mode will now be activated for your use.

Additionally, if you wish to connect a second satellite signal to the Sky box, follow the reversed process above to turn off the single feed mode again.

Get Fast-Service Aerial Repairs and CCTV Installations

Can I Connect my Sky Box to the Internet?

Of course! You can either connect your Sky box through a wired connection, or a wireless connection.

Wired connection:

  1. Using the Ethernet cable, plug one end of its end into the Ethernet port behind your Sky box.
  2. Then, plug the other end of the Ethernet cable into one of the available ports behind your router.
  3. After these two simple steps, your Sky box will now be connected to your chosen broadband.

Also, the Wired Connection is a more recommended way of connecting your Sky box to the internet to ensure that your network connection will be faster and stronger.

Wireless Connection:

For Wireless Connection, you can either connect using the WPS buttons or by using your WiFi password.

When connecting with WPS:

  1. Hold and press the WPS button of your router until it flashes, then quickly click on the WPS button on your Sky box.
  2. The wireless light on your Sky box will flash then will turn into a solid amber colour once you are finally connected.

When connecting with WiFi Password:

  1. Press ‘Services’ on your sky remote then select Settings, and under Settings, choose Network.
  2. Click the Connect with Password option, and choose the WiFi Network and input your password.
  3. Once done, your Sky box will now be connected to the internet.

Have other problems? Aerialforce can assist you!

If you have other concerns about your home entertainment system, reach out to us at Aerialforce so we can give you a hand! Other than TV Aerial maintenance and installations, we also provide CCTV, locksmith, and satellite services. With us, you don’t have to worry about any of your appliances. Call us on 0330 173 8667 or book our services online if you wish to reach out to us.

How to Set-Up Sky Remote: A Complete Guide

Sky Remote

While Freeview and Freesat are excellent programs, it doesn’t exactly provide the premium TV experience. If you want to splurge on your home entertainment system, you can consider switching to Sky TV. It has some of the best channels and shows in the UK and they are constantly creating new packages for their users. 

The company has a whole family of additional devices like the Sky remote control and the Sky box. If you are new to Sky, control your viewing experience by properly setting up your system. Once you figure out how to program your Sky remote control, you can host movie nights with family and friends! Here is Aerialforce’s complete guide for how to set up Sky remote.

(If you are interested in our other Sky guides you can check out: Watching Sky TV From Multiple Rooms: A Guide)

Best CCTV installers and Aerial engineers near you

Different Sky Remotes

Over the years Sky TV released several versions of the Sky remote. They have one for Sky TV, Sky+, and Sky Q. For Sky TV and Sky+, you should have no problem switching between the two remotes. 

The main difference between the two is purely aesthetics, though users have mentioned that it is easier to change the batteries on the Sky TV remote than Sky+. The Sky box isn’t too picky, but you may need to toggle around the settings if you want to use your Sky remote for your HD box.

With the recent addition of Sky Q, they expanded their remote control options. Some of the highlights of these new remotes are voice control, touch feature, and Find My Remote. There are 3 stand-out models. The first kind is similar to the traditional Sky remote control. It has the usual buttons and features. Unlike the regular Sky remote, this one has a voice control option. 

The second is the Sky Q Touch remote. Just like its name, it has a touch-feature so you can swipe and scroll through your channels. People have mixed feelings about the touch remote because of its sensitivity. When you accidentally tap or swipe, it can affect your viewing experience. If you don’t have young children at home, it is very easy to use. Among all the Sky remotes, this one really grows on you. 

(If you are interested in switching to Sky Q, you check our The Complete Guide to Your Sky Q Installation)

And the third model is a combination between the two. It has the same style and design as the touch remote, but instead of its touch feature, you get the usual buttons. Now that you know the different remote options for Sky, let’s go through the step-by-step process of pairing them with your TV.

How To Connect Your Sky Remote To Your TV

When you are connecting a new Sky remote to your TV, your old Sky handbook can come in handy for the digit codes. However, if you already chucked it in the bin, here is how you can connect your Sky remote to your TV:

Identify Your Model

The first step is identifying the model of your Sky remote and your TV since this can affect the codes you can use. You can identify your model by looking inside your battery cover. Then get the brand and model of your TV. Figuring out the brand is a no-brainer, but the model can be tricky. You can check your TV manual, box, or purchase receipt to find out. With all this information you can find your 3 or 4 digit codes for Sky remote here. 

Program Your Remote With Code

Have your 4 digit code for Sky remote in front of you, and you can get started. It is a simple process that only takes 3 steps when you know your code. 

  1. Press TV on your Sky Remote.
  2. Press Select and the Red button at the same time until the red light on your remote blinks twice
  3. Input your 4 digit code and press Select. 

Having problems with your sky remote control? If you are sure about your 4 digit code, simply try again. Sometimes it takes a while until your TV can properly save it. If you do not know your exact code, try every 4 digit code listed for your TV brand until you find the right one. 

If you have exhausted both methods, but your sky remote control does not pair, maybe it isn’t a 4 digit code. If you got your Sky remote second-hand, it probably is a 3 digit code because it is an older model. The instructions are the same, press TV, press select and the red button until it blinks twice, then input your code. When you can control the volume, you successfully set up your sky remote control!

How To Connect Your Sky Q Remote To Your TV

If you are connecting a new Sky Q or Sky Q Accessibility remote to your Sky box, here are the following steps:

  1. Press the Home button on your Sky Q remote.
  2. Select Settings > Setup > then Remote Control
  3. Select the Remote you are using
  4. Then select Control Your TV, then Find It For Me
  5. From there select your TV brand among the options
  6. Press and hold buttons 1 and 3 for 2 seconds and enter the code on your screen.

You can see if you successfully paired your Sky Q remote control by changing the volume or flipping through the channels. If it doesn’t work, you simply have to try again. 

In the worst-case scenario, set it back to its factory default setting by pressing 7 and 9 together until your remote’s red light flashes 4 times. When you reset your remote control, you can try again.

Get Fast-Service Aerial Repairs and CCTV Installations

How To Connect Your Sky Q Touch Remote To Your TV

If you have a Sky Q Touch Remote or a Sky Q Voice Control remote the instructions vary. 

  1. Press and hold buttons 1 and 3 at the same time
  2. Select Continue and go to Brand of the TV
  3. Then Select Find It For Me

Again, if you cannot change the volume, follow the steps in the previous section and try again. When you can change the volume, answer the final question. If you have a speaker system, there are more instructions you have to follow to program your Sky. If you don’t have a Soundbox or speaker, you are good to go!

When you finish pairing your Sky Q Touch remote, you can set up touch control 

  1. Press the Home button
  2. Select Settings> Setup> then Remote Control
  3. Select Sky Q Touch Remote and turn Touch Control On or Off

Then that’s it! You can now swipe, scroll, and tap to control the settings of your TV like you would with your smartphone. It is a nifty feature that can make it difficult to go back to the old Sky remote. If the touch feature is not for you, then simply turn it off and use the buttons as usual.   

Important Things To Note

Your Sky box can only accommodate one TV remote at a time. If you are replacing a damaged Sky remote or upgrading to a newer model, you need to unpair the previous remote control first. You can reset the factory settings of your old remote by holding 7 or 9 until the light flashes 4 times. If you damaged or misplaced your Sky remote you have to manually unpair it from your Sky box. If these steps don’t work, you can always contact Sky with your questions and concerns. 

If you have a Sky Q Voice Control remote, you can only use the voice control feature when your Sky box is connected to your broadband. If you lose your broadband connection, you can no longer use Voice Control and may have to make do with the buttons instead.

And last, but definitely not the least, you can set your Sky remote to control your TV and Sky Q at the same time. You can turn both devices on and off with HDMI control. However, you need to have a compatible TV with a feature Sky calls Consumer Electronics Control (CEC), but it can go by many names. If you have a more current TV model, this should not be a problem. To program your sky remote control follow these steps:

  1. Press the Home button on your Sky remote control
  2. Select Settings> Setup
  3. Select Audio Visual> HDMI Control then turn it On

This feature was first introduced with Sky + as HDMI One-Touch-Play. The instructions are similar. Visit settings and setup and turn the CEC setting on, once you have it in place, press the Standby button. Keep it on Standby for 30 seconds then press the Sky button, and you can get HDMI control!

With every upgrade, your Sky remote just gets better and better. Whether you notice it or not, your Sky remote control can affect your TV experience. If you are interested in switching to Sky, Aerialforce can help you set up your satellite dish! We have professional technicians who can get you the best TV reception possible. You can contact us at 0330 173 8058 or book us online here!

How To Connect A Soundbar To Your TV Using An Optical Cable

tv soundbar

If you’re the type who appreciates sound on your TV just as much as the picture, then you would appreciate the soundbar. By simply hooking it up to your TV, you will be able to help improve your overall TV viewing experience

Do you own a soundbar and don’t know how you can use it on your TV? Or are you just looking for ways to upgrade your TV’s audio? Regardless, you came to the right place! You can now stop searching “how to connect soundbar to tv with optical cable” on Google. We’ve got you covered.

In this guide, we will be showing you how to connect your soundbar to your TV with an optical cable, and helping you deal with all kinds of connectivity issues that you may encounter while doing so. 

Best CCTV installers and Aerial engineers near you

Pros and Cons About Using A Soundbar

If you’re still unsure on whether using a soundbar is the right decision for you, I’ve come up with a pros and cons list for your perusal. 

Pros of a Soundbar

  • It is affordable
  • Setting it up is extremely straightforward
  • The audio quality is infinitely better than that of a TV speaker 
  • You don’t need extra devices to make it work
  • The soundbar is compact 

Cons of a Soundbar

  • Not ideal for a large room in terms of sound coverage
  • Limited upgrade options
  • More expensive models do not necessarily mean better quality
  • Placement or location may affect the reach of the sound
  • Size may limit options for placement or installation, TV wire organisation, etc.

Understanding The Optical Cable 

The soundbar can easily be connected to your TV using a wide array of methods, including wireless or Bluetooth, HDMI, ARC, AUX cord and of course, the optical cable.

All of these methods have only one goal, and that is to transfer electrical signals from one device to another via analogue or digital channels. And while the optical cable port is often neglected on our media devices, it is one of the most reliable and effective methods of transmitting sound or audio signals between devices. 

These digital optical audio cables, which were first manufactured in the early 1980s by Toshiba, makes use of laser light to transmit audio signals from Point A to Point B. However, despite the age of optical cables as a technology, these cables remain second only to the HDMI cable in terms of delivering high-quality sound. 

The only difference between the two? The HDMI cable can deliver Digital Theatre System HD (DTS HD) audio and Dolby audio, which is found on Blu-ray, while the optical cable cannot.

So, if you find that you cannot use your TV’s HDMI port, or simply have an old television that does not have the HDMI ARC (audio return channel) port, the optical cable is a worthy alternative you would want to use. 

How To Connect The Soundbar To Your TV

Here’s a step-by-step guide on how to connect your soundbar to your TV with the optical cable:

  1. Check if your optical cable is ready for use. Look for a fitted plastic cap on both ends. If you find one, remove it. Your cable should be ready then. These two identical ends will connect to both your TV and soundbar.
  2. Look for the Digital Audio Output optical port behind your TV. Once you find it, connect one end of the optical cable into the port. 
  3. Next, locate the Digital Audio Input optical port on your soundbar. Once you find it, plug the other end of the optical cable into the port.
  4. Make sure the soundbar optical cable has been inserted correctly, as this will help transmit the optical signal between the TV and soundbar. 

Once you have physically connected the two devices, make sure that they are both set to transmit and receive signals from one another. 

  1. Set your soundbar to Digital In (D-IN) mode. To determine if it is already in Digital In mode, check for it on the LED light or a digital display indicator. 
  2. At this point, the TV should automatically feed the audio signals to your soundbar. However, if this is not the case, you may want to check the inbuilt audio from the speaker. This should be switched off.
  3. If your TV still does not feed the audio signals to your soundbar, you may have to manually mute your TV speaker in your TV’s audio menu for it to work. Here’s a quick guide on turning off your speakers from Bhupinder Tube, a tech vlogger from the UK 

Final Thoughts

Installing and integrating a soundbar into your TV system is quite simple and easy. All you have to do is follow a few simple steps, and soon you’ll be enjoying your favourite programme with improved sound quality! You don’t even need the technical know-how to set it all up!

Meanwhile, if you are planning an entertainment centre overhaul, and are considering spending some time and money on this project, you may want to contact us and book an expert from Aerialforce to help you plan and set everything up! 

Get Fast-Service Aerial Repairs and CCTV Installations

What Is A Masthead Amplifier and How Do I Install It?

tv amplifier

Nobody likes getting poor TV reception. That much is true. Fortunately, dealing with weak signals isn’t as difficult as it seems. Several different devices have been developed to help address this issue. One example is the masthead amplifier, which is determined to be one of the most effective ways to boost your TV signal. 

What Is A Masthead Amplifier and How Does It Work?

A masthead amplifier is a device used to boost a TV signal at the TV aerial, where it is at its strongest. It absorbs the signal received by aerial and sends it through the coaxial cable and to the TV, already amplified. 

Masthead amplifiers are connected to a power supply through an uninterrupted coaxial cable. Most domestic tv masthead amps require a 12V DC, or a 5V DC power supply to work, while non-domestic settings, like a block of flats and other communal systems, may best work with an 18V or 24V DC power supply. 

Best CCTV installers and Aerial engineers near you

Most Common Classifications of Masthead Amps

To determine the best masthead amplifier to use for your TV system, you must have an idea of how they are usually classified. Here are the most common ways TV masthead amps are generally classified:

  1. Frequency Band

In the past, masthead amps operated on UHF for channels 21-69. However, the release of 4G, which migrated the operation of channels 60 to 69 on the 800Mhz band, has limited the reach of a masthead amplifier to channel 60. Additionally, 5G signals have also emerged, which means the migration of channels 50-60 on the 700Mhz band. 

Due to this, masthead bands that pass only through certain frequency bands exist. If you’re worried about getting a masthead amplifier that has access to certain frequency bands only, you don’t have to worry as wideband masthead amplifiers exist!

  1. Amplifier Output Count

When you have multiple TV units, it is much advisable to install multi-output versions of the masthead amplifier. As an alternative, you may also opt to use a single-output masthead amplifier and install a splitter to connect to your other TVs. 

Some multi-output masthead amplifiers will require you to keep the power supply unit (PSU) connected to one particular output, but this is ot always the case. Some masthead amps will allow the PSU to be connected to any output. 

  1. Signal Gain

There are different makes and models of masthead amplifiers in the market. That means a particular masthead amplifier may output signal at a greater or smaller level than others. A TV masthead amplifier with fixed gain runs at about 10db. Meanwhile, masthead amps that have variable gain would often run between 15dB to 27dB. 

Masthead amps with variable gain are best used in areas with weak signal strength or when there is a high-output passive splitter connected to it. The adjustability in gain is also helpful in balancing the system when needed.

Do take note, though, that most masthead amplifiers will have a maximum input and output. Going over this limit can cause an overload that may result in a faulty amplifier, pixelation and loss of TV reception. 

  1. Power Consumption

As mentioned above, masthead amplifiers need to be connected to a PSU  for it to work. The most common masthead amps run at 5V, 12V, 18V and 24V DC power supply depending on their make and purpose. 

Installing Masthead Amplifiers

Now that you’re aware of the different types or classifications of masthead amplifiers, it is time to start installing one. Here are some tips on where to install your amplifier and PSU, as well as a step-by-step guide on how to install your masthead amp!

Where Do I Install The PSU?

While instilling your masthead amplifier’s PSU, it is important to put it at a location where it is safe from getting switched off or unplugged often. It is, thus, advisable to install the PSU in the loft or attic, or within a cupboard. Alternatively, you may also place it behind the TV, but you must come up with a solution to ensure the power supply does not get cut off. 

Make sure to install the PSU into its own socket, rather than into an extension socket or adapter. By doing so, you are effectively minimising the risks of it getting accidentally switched off or unplugged.

Where Do I Install The Masthead Amplifier? 

For optimum performance, the masthead amplifier should be installed as close to the aerial as possible, with it being connected by at least a metre of coaxial cable. As its name implies, it is most ideal to be tied, strapped onto the TV aerial mast or pole. 

Masthead Amplifier Installation Guide

  1. Use a coaxial cable to connect your TV aerial to the input terminal on your masthead amplifier.
  2. Prepare an uninterrupted coaxial cable and install it between the amplifier and the PSU. Connect it to the output of the masthead amplifier. 
  3. Connect the other end of the second coaxial cable into your PSU and plug it into the power main. 
  4. Connect a coaxial cable from the output of your PSU  to the input of your TV or distribution system. 
  5. Enjoy!

For a visual guide, here is a video from TVTradeDave who specialises in video guides for TV, Saorview and CCTV.

Problems You May Encounter After Installing Masthead Amplifiers

  1. Faulty Electrical Wiring

Just like any electrical device, the power supply of a masthead amplifier can become faulty. In fact, the PSU is usually where issues occur. In such instances, you may simply replace the faulty device.

  1. Disconnection From PSU

If there is no signal where the masthead amplifiers are in place, check if the power unit is plugged in and switched on. This is also a common mistake most TV owners make. Simply plug the power supply back in and turn it on to start enjoying your TV again!

  1. Not Enough Power Reaching The Masthead Amp

Wall-plates and splitters may prevent the power from reaching the masthead amp. This usually happens when the wall plates and splitters do not allow DC to pass through. To fix this issue, use equipment that allows both to do so. 

  1. Signal Overload

You do not always need an amplifier for your TV. If you are receiving moderate to strong signals and add a masthead amplifier, the signal will be too strong. This, in turn, may overload your TV and ruin your viewing experience rather than improve it. 

  1. Weather

Always remember to weatherproof your masthead amplifier. Whether you seal it shut with tape or put a protective covering around it is up to you. What’s important is that you protect it from water, wind and other debris that it may encounter. 

If you are unsure about installing a masthead amplifier to your TV aerial, you may also consider contacting an Aerialforce engineer or any professional aerial engineer to help you out!

Get Fast-Service Aerial Repairs and CCTV Installations

Can I Connect The Satellite Dish Directly To The TV?

TV aerials and satellite dishes both receive signals and send them to your screen. From news coverage to your favourite soap, aerials and dishes offer the same experience. Since they have the same task, there is a blurred line between the two. However, you can’t just replace one for the other. Let’s tackle common satellite and TV aerial questions and create a distinct line between what can and cannot work on both devices 

What Is The Difference Between A Satellite And An Aerial? 

The main difference between a satellite dish and an aerial is how they go about their job. Think about how these machines receive signals, a satellite is thousands of meters away from the tallest transmission tower. How can they be the same when the way they go about their job differs? The tech behind the machines supports its own format. 

What Is A Satellite Dish? 

Dishes have four parts: the feedhorn, the dish, the low-noise block downconverter (LNB), and the mount. Now, how do these parts work together? The dish reflects the signals from the satellite to a fixed point which creates a better signal for the feedhorn. From the feedhorn, the waves go to the LNB which converts it to a format that your TV satellite box can read. 

One of the many pitfalls of dishes is that they receive so many signals. The wrong direction or azimuth angle could affect the number of channels you receive. It can also affect the quality of the channels you have. So it is important to have decent reception.

Satellite TV can be for everyone. However, people who live in the countryside, away from the main transmitters benefit the most. 

Best CCTV installers and Aerial engineers near you

What Is An Aerial? 

There are two different types of aerials, indoor and outdoor. The parts may vary depending on the type and model, but TV antennas have four components: dipole, directors, reflector, and the mount/mast. The dipole receives the signal sent by nearby TV transmitters. The directors and reflector in outdoor aerials help with reflecting and increasing the sensitivity of the signal. From the dipole, it runs through the coaxial cord that connects to your TV. 

TV aerials are popular in urban areas. As long as there is a TV tower within less than 50 miles, aerials should do the trick. The maximum range for a TV aerial is around 80 miles, but even then it’s a bit of a stretch. 

The ideas behind the two of ways of getting TV are the same, but they get their signals from different sources. Your TV dishes need to decode their signals, but your aerials do not. The types of signals they receive are different, so they cannot do each other’s job. Choose one and work around that. All you need for Freeview is a TV aerial. For Freesat, you need a TV dish and a Freesat box. 

Can I Connect The Satellite Dish Directly To The TV?

This question is a tricky one! Typically, the answer would be no. You cannot connect your satellite dish to your TV. The signals from satellites are in a different format since they come from such a far place. You need a satellite TV receiver to demodulate the signals from your dish. So, it is a coaxial cord to the set-top box and set-top box HDMI cable to your TV.

Now, what if you are not a part of the majority? Can I connect satellite dish directly to TV? If your TV has satellite support built-in for demodulating, then you can link to your TV. However, this has its pitfalls. No set-top box limits what you can do with your satellite dish. You can only get the Freesat channels in your area, no free international content. 

New TV models are more likely to have satellite support, but it is best to ask if your satellite TV ticks off all the boxes. Remember to confirm what the set-up would be if you brought the TV home. You can also try the TV brand’s customer service to make sure. 

Can You Connect A Freeview TV To A Satellite Dish?

Your TV can be for Freeview or Freesat channels as long as you have the right equipment. So yes, your previously Freeview TV can connect to a satellite dish. However, the set-up will not be the same. 

Aerials use terrestrial digital signals, while dishes don’t. If your TV does not have dual tuners or you don’t have a set-top box then, no you cannot connect your TV to a satellite dish. When you shift between the two, you need to get all the other equipment necessary to make it work. 

Can I Watch Freeview Channels With A Satellite Dish?

Sadly, you cannot watch Freeview with a satellite dish. If you love Freeview’s selection, it may be hard to consider using anything else. However, dishes come with their own set of free channels in Freesat. Freeview and Freesat are not the same, but they have similar selections.

Your TV can get over 200 radio and TV channels. BBC One, BBC Two, ITV, Channel 4, Channel 5, CBS Drama, Horror Channel, Pick, and Dave are some examples of what you can get with Freesat. Doesn’t that list look familiar?

You can also catch up on shows with BBC iPlayer, ITV Hub, Pop Fun, Ketchup TV, and CBS Catchup. These websites also have app versions for watching on the go. Other on-demand players like Netflix are not for free, though. 

Get Fast-Service Aerial Repairs and CCTV Installations

What Should I Do If I Want To Watch Freeview?

When the Freesat experience is not for you, find a TV aerial, even a TV aerial from ye-olde-analogue days should work just fine. As long as you live near a TV transmitter, you should be able to enjoy Freeview channels.

When there are no TV transmitters near you, try to give Freesat another try. The direction and the azimuth angle is critical. Nowadays, you can even pick up on HD channels with Freesat. Try to give it a proper test run before getting a TV aerial.  

Can You Use A Sky Dish As An Aerial?

If you think about it, a satellite dish is an antenna in its way, a parabolic one. However, that does not mean it can do the same thing. You cannot use a dish as an aerial, though people have ways of repurposing an old Sky dish

Their version of repurposing is to make the satellite dish the mount. You can take out the LNB and attach your clip-on aerial there. Your coaxial cord will run from the TV aerial and not the dish itself. 

Now some people claim that you can modify it. Add parts for radio frequencies, and then you are good to go. However, there is no guarantee that this will work the way it should. 

You will end up purchasing parts anyway to make this modified version, might as well upgrade your dish. Pair your new dish with an old Sky box to watch your shows. Or do the quick fix for dishes with weak reception by switching out the LNB. You can also look for a TV aerial. There are many affordable models on the market. These methods are more effective and affordable than modifying anything.

Can You Connect Satellite To A TV Without The Box?

Like we mentioned earlier, you cannot connect your satellite to a TV without a box. The satellite receiver for TV is what decodes and demodulates the signal so you can view your shows. Only TVs that have satellite support for demodulation can connect to a satellite without a TV receiver box.

All these questions focus on making use of what you have without compromising your entertainment experience. If you have an old dish and a Freesat box, why bother with Freeview? An old aerial can still get you Freeview. When these things don’t work, you can call us at AerialForce to install a new dish or aerial.

Having BT Youview Box Problems? Here’s What You Can Do To Fix It!

There’s nothing worse than encountering BT YouView box problems when you’re already comfortable in bed or on your couch while watching your favourite show or movie. It’s annoying, frustrating, and quite frankly, definitely a mood-killer! 

Fortunately, whether you’re dealing with signal loss, missing channels, distorted or pixelated picture, spotty audio, a faulty remote control or recording problems, BT Youview box troubleshooting is not as difficult as you’d think. 

So, if you’re looking to fix the issue on your Youview box yourself, you’ve come to the right place! Read on to find out just exactly what you can do to get back to your programmes as soon as possible!

The Most Common BT Youview Box Issues And How To Fix Them

Before you go and contact customer BT’s customer support, it is best for you to try and address your BT box issues yourself. Here are some of the most common BT Youview Box issues and how you can fix them:

Poor TV Signals

“Your TV signal is weak or lost.” 

If this message appears on your screen, try to figure out if the issue is isolated in one channel, or it’s affecting everything. If it is isolated to one channel, then it could be weak signal transmission from their end. However, If it’s the latter, then you may be experiencing intermittent aerial connection. 

If this is the case, you may want to check out the positioning of your TV aerial or the quality of your aerial installation. A few adjustments to your aerial may just fix this issue.

You may also want to try checking the signal quality in your BT box’s settings menu. If your set top box is receiving signals that are too strong, it is also likely for it to overload the Youview BT box, hence causing poor TV signals. If you think this is the problem, try reducing the signal level to 85 or 90%. You may also use a TV Signal attenuator to address this issue. 

Missing channels on your BT TV box could also be a result of poor TV reception. If this is the case, perform the same troubleshooting steps above. 

Best CCTV installers and Aerial engineers near you

Audio or Video Issues

If you are experiencing pixelated or broken up pictures and delayed or missing audio, restart your TV system. Your set top box and TV probably just need a quick reset to start working properly again. 

However, if restarting your device does not work, then you could be having network issues. 

If you are having network or broadband connection issues, make sure the issue isn’t from the service provider’s end or check if your phone line is working. If neither of these is the root of the issue, restart your BT Hub.

Many network problems are often fixed by simply restarting the connection, so there is a likely chance that you will be able to resolve your broadband issues this way. After restarting, check if the lights on your hub are powered on. 

BT Box Is Not Working At All

If your BT Youview is frozen or stuck on loading, all you have to do is restart your BT Box. If this does not do the trick, then your device may be due for a software update. 

To check for a software update, follow the steps below:

  • Press the YouView button, select settings
  • Go to the Information & Reset sub-menu. 
  • Select Software Information.
  • Click Update Software.

If this does not work, you may have to do a full factory reset. However, when you reset your BT box, you may lose your existing recordings. To prevent this from happening, try resetting your device on maintenance mode

No Blinking Lights

If there are no lights on your BT Youview box or box connectors, it is either not working, or not receiving enough power. 

Check if the power is switched on and if everything is securely connected. If you find that neither is the issue, you may have to replace your connectors and powerline adapters. 

Stuck On Maintenance Mode

When you try to start the box and see that it is stuck on the red light or on maintenance mode, immediately try restarting the box. If this does not work, press the arrow button on the box to enter maintenance mode. Follow the prompt and check if the indicator light is blue. 

If this does not work, you may have to do a hard reset. 

Get Fast-Service Aerial Repairs and CCTV Installations

Recording Issues

Recording issues are normally caused by poor broadband connection or poor Freeview signal. To make sure you successfully record a programme or channel, you have to ensure that the channel you want to record can be viewed properly. 

Make sure that your BT Youview Box stays on during the whole duration of your recording. Turning it off will also prevent you from recording anything. 

Lastly, check the list of your scheduled recordings on your My TV menu. Any overlaps will cause problems for your recordings.

Remote Control Is Not Working

Now, this one is quite simple. In most cases, all you need to get your remote control working again is a fresh set of batteries. 

Also, check for the connection between your remote and the TV box. If the light on your remote control is blinking, but the TV box is not responding, you may have to reboot your TV Box. However, if this is not the case, you may want to reset, or worse replace your remote control.

What Happens When None Of The Troubleshooting Methods Work?

If none of the troubleshooting methods above work, you may have to replace altogether your BT YouView box. If you think your box is still salvageable but are not entirely sure on how to fix the issue, ask an aerial TV professional from your neighbourhood or from companies like AerialForce to assess your BT box and TV aerial, and address these issues themselves. 

Final Thoughts

Save yourself the frustration and stress that comes with being to address any issues that cut into your TV viewing and leisure time! Keep these troubleshooting methods handy to make sure you’re ready the next time you experience any of these issues! 

How Do I Find the Nearest TV Transmitter to My Postcode?

TV towers aren’t just tall skyscrapers that you admire from a distance. Besides adding to the city skyline, they have a vital role in making sure your favourite soap reaches your TV. They do the grunt work of making sure every home with a TV aerial gets their Freeview channels. With over 18 million households using Freeview, you can see why it takes a whole network of transmitters to reach every neighbourhood. In summary, they’re the reason you’re able to watch Frasier, Line of Duty, and Normal People.

Unfortunately, you might not experience your shows the way you want to because of technical problems. Like all technology, a little bit of know-how can go a long way. Here are a couple of questions to help you understand your TV aerial and TV transmitter a bit better: 

Why Can’t I Watch My Shows? 

Even with great reception, you can lose channels a little bit over time. It is the reality of the cable cutter experience. If you have problems with your TV channels, first check if they are available in your area. You can do this by visiting the Freeview website and typing in your postcode to see what channels reach your neighbourhood. If the list online and channels on your TV do not match, then there are three possible problems: 

  1. Faulty transmitter
  2. Faulty aerial
  3. Signal disruptions (obstructions, heavy rainfall, etc.)

Best CCTV installers and Aerial engineers near you

Faulty Transmitter 

If you are struggling to get reception, check your local transmitter through BBC’s or Freeview’s site. You can see the active towers near you. You need to enter your postcode and house number to get accurate information. The checker will show you a map of your area and the nearest TV transmitter and its current status, whether it’s good, varied, or faulty.

If a TV transmitter near me is not working, it would be red. I can look around for the nearest TV transmitter to me in the green/good to try to connect to their service. Its coverage should reach me for it to be a proper replacement.

If you have a faulty transmitter, try to look for a new one within the area. These TV towers often overlap in urban areas, so you can quickly remedy the reading by adjusting your aerial. If there are no other towers near you, you may have to wait until it is up and running again. 

Faulty Aerial 

The next thing you should consider when the TV towers have no problems is your own aerial. Aerials are fickle things. They need to face the right direction and to be in the proper angle before you can enjoy your channels. 

On top of that, outdoor aerials have to brave the elements. A torrential downpour of rain could affect your aerial’s position, making it harder to receive any signal. Indoor aerials are no better. While they don’t experience the same wear and tear, they are not that strong. Other types of signal interference could affect your aerial.

Try to test out different positions for your indoor or outdoor aerial. Try to see if the quality of your show becomes clearer or not. If you have no luck making it work with the right angle and direction, it might be time to replace it. Check out 

Environment Issues

Before you replace your aerial, try to inspect your surroundings. There might be environmental changes that affect your reception. Are there new trees, buildings, or posts? Just because you do not see these changes in your immediate area, doesn’t mean they aren’t there. 

People who live in valleys and wooded areas are more sensitive to this. A TV transmitter doesn’t cover these areas evenly. Most homes here depend on relay transmitters. If the relay transmitter near you has problems, it could affect your viewing experience as well. 

How Can I Improve My Signal?

Improving your signal starts with addressing the previous problems. Even if you do not lose your channels, those steps can help you get better reception. You can upgrade your aerials with models that can handle interference better. 

You can switch between transmitters. For example, the nearest TV transmitter to my postcode in Surrey is Freeview’s Reigate transmitter, but Crystal Palace is south enough for my aerial to pick up. I could try Crystal Palace even though it’s farther because it has more channels. The distance is not the only thing that affects your reception, so a transmitter that is farther but offers more channels might be more effective. 

Since not every area may have a tower, I could also check maps for TV transmitters near me and not the nearest TV transmitters to me. There is a difference. Instead of looking at your postcode, focus on the miles instead. It will give me more things to try, and from there I can compare the different signals. It can be an excellent benchmark. 

You may opt to get a TV signals booster. However, signal boosters have a history of mixed results since they can sometimes get the wrong signals. Read more about signal boosters here

Where Is My Nearest TV Transmitter?

There are several ways you can look for your nearest TV transmitter. You can check Ofcom’s transmitter location maps on their website for the digital switchover plans. You can get the names of the transmitters and towers and look it up in Google maps. 

You can also check the UK Free TV website for news on transmitter repair work and Freeview transmitters across the country. Take note of the direction it is in and adjust your aerial accordingly.

So how do you know if the TV transmitter you found is the right one? There are two ways you can do it. The first is to compare your aerial with your neighbour and the second is to look up your postcode.

Look At Your Neighbour’s Aerial

People who value their privacy might feel uncomfortable at the idea of posting small details of themselves online. When you enter information online, the cookies may remember them. You can always opt to clear your cookies history to remove personal information online. 

If you do not want to check your postcode, you can do the age-old method of following the crowd. Look at your neighbour’s homes and see what direction their outdoor aerials face and follow suit. All aerials try to look towards the TV transmitter.

You can try to check 5 different homes to see if there are other key directions. Pay close attention to the houses who had theirs professionally done. They have the ideal direction and position. You could also ask around if you are close to your neighbours. 

Now, this method will not help in areas with relay transmitters. Large outdoor aerials may face the main transmitter while the smaller indoor aerials go towards the relay transmitters. In this situation, trial and error is the best way to figure out which one is best. 

Get Fast-Service Aerial Repairs and CCTV Installations

Look Up Your Postcode

All transmitter maps require your postcode. To get precise information, you may have to give that along with your house number if your neighbourhood is big. Remember to clear your cookies history if you include your house number as a precaution. Enter these details on the online TV transmitter maps website to see which one is closest to you. 

When you input your postcode, take note of the distance between you and the tower. TV aerials do not have a lot of coverage. While they may seem close on the map, the numbers on your antenna may beg to differ. 

For people who live in rural areas be wary of aerials that advertise 80 miles and more for their range. The upper end of that should also be an outdoor aerial, not an indoor one. Advertisers tend to stretch their specs, so conservative estimates are more likely to be true. 

Which Way Should I Point My TV Aerial?

Always point your TV aerial in the direction of your TV transmitter. You can use a compass, to match the coordinates on the maps. Or use Google maps and rotate to properly orient yourself.

Now, there is an exception to this rule. It is when you have a clear obstruction in that same direction. Massive buildings, posts, trees, and other similar things block the signals for your TV aerial. Try to look for a clear space to install your antenna. 

In urban areas, signal interference is also common. The signals from cars, homes, and businesses can affect your reception. Try to avoid those as well. 

The same rules apply for your indoor aerial. Stay close to windows and avoid significant obstructions. Keep your aerial away from other devices that might produce signals that conflict with your aerial. Try to keep your aerials as high as possible too. 

Where Are TV Transmitters Typically Located?

Ofcom regulates where the TV transmitters are so there will be minimal interference. Besides that, there is little information about the factors that go into their location. Most of them tend to be in populated areas. In the countryside, they stay near the central regions to get the most coverage. Since TV transmitters have minimal coverage in these types of areas, most people opt for satellite dishes instead. 

How Can I Check The TV Signal Strength In My Area?

With no extra gadgets, the best way to test for TV signal strength is to have all the channels listed in the TV guide website. They already took into account the loss for your area. If it says you should get 122 channels, but you only get 80, then the signal strength is weak. You can manually try different setups until you find the majority, if not all, of the channels.  

You can also buy an aerial signal meter. Detach the coaxial cord from your TV set and input it to your meter and attach your meter cord to your TV. Rotate your aerial while you take note of the signal strengths each time. The more LED lights go green, the stronger the signal. You can do this several times until you narrow it down to the best angle. 

Over the counter meters have mixed results, so try to buy the ones your friends and family use. You can also opt to get a professional to do this. They have the gear and equipment to get the best TV signal strength. 

No matter how great the tech, TV aerials still have a bit of guesswork. Online TV guides and transmitter maps are excellent references for you to check your reception, but the ever-changing environment prevents this from being a fool-proof plan. Hopefully, with a lot of patience and luck, you can see the difference and return to your regular programs in no time. 

If doing all of these steps still doesn’t give you a proper reception, then it may be time for you to call the professionals. We, at Aerialforce, can come to your house on the same day of your distress call so you can continue to watch your favourite shows without any problems.

How to Update Sky Box

Sky Box Software Updates

Sky Boxes receive software updates from time to time. Software updates are delivered through satellite to make changes in your Sky Box. These changes are usually improvements to the performance of your Sky Box such as new exciting features and bug fixes for system problems so you should welcome them with open arms. However, updating can be quite a tedious process if you don’t know how. That is why we have created this article to help you on how to update your sky box.

Sky Boxes, whether it is a Sky+ HD box or a Sky Q box, get updates and install them automatically. However, these Sky Boxes become unreliable and glitches when they are switched off or disconnected for a long period of time. For instances like this, you have to manually update them.

How to Update Your Sky Box Manually

Due to the advancement in TV technology and the rise of TV on-demand, manually updating your Sky Box seems to be a thing of the past. However, there are some instances where you still need to update it manually before you can watch with your TV. Here is a guide on how to manually update Sky Box to the latest software. This guide provides step-by-step instructions for both the Sky+HD box and Sky Q box.

Best CCTV installers and Aerial engineers near you

Updating Your Sky+HD Box

You can download your Sky Com Software Update for your Sky+HD box by following the instructions below:

  1. Press the standby button using your remote.
  2. Switch off the Sky+HD Box and disconnect it from the power supply. Also, turn off the other devices connected to the box. Wait for at least a minute.
  3. On the top panel of the box, press and hold the backup button. While pressing the backup button, turn the power supply back on.
  4. Keep pressing the backup button until the box resets. You’ll know this when all four LEDs in front of the box light up. You should now see the software update screen on your TV screen.

Note: If all the four LEDs still do not light up even after pressing the backup button for 30 seconds, repeat this step. If the lights still do not appear, it is best to ask for professional help. Aerialforce has Satellite TV Engineers all over the UK who can help you with your Sky Box.

  1. Do not disconnect the Sky+HD Box from the power supply or satellite dish while the software is updating. Doing so may cause permanent damage to your Sky Box. While waiting for the search and download to finish, we advise you to switch the TV to another screen to avoid screen burn.

Note: The software update screen will stay on the screen for about 5 to 10 minutes, until the download finishes. If the download seems to be stuck, try disconnecting the Sky Box from the power supply. Wait for 5 minutes, then repeat all the steps.

  1. You will know the software update has finished when the four LED lights disappear. The box will then switch to standby.
  2. Wait for at least 3 minutes before switching the Sky+HD Box back on. A green LED will light up on the front panel of your box. You can now watch your favourite shows and videos on your TV.

Updating Your Sky Q Box

You can download the Sky Q Software Update for your Sky Q box by following the instructions below:

  1. Go to the Settings of your Sky Q box. Under the System Info, highlight Software version.
  2. Choose Setup
  3. Start the download by clicking Software download.
  4. The search and download take about 10 minutes to finish. Make sure that the box is not turned off or disconnected from the power supply while the software is updating.
  5. You can check the status of the Software update by going to the Settings. Choose System Info then highlight Software version.
  6. When it says “Software update successful” it means your Sky Q Box is now updated to the latest software version. You just need to wrap up your download by pressing the Standby button on your remote.
  7. Your box will then restart. Once it restarts, follow the on-screen instructions. Your Sky Q Box should then be on the latest software version, and you can now watch your favourite shows on your TV.

Note: If you are seeing hard disk error messages on your screen, you need to know how to reboot Sky Q Box. Hard disk errors prevent your TV to set or play videos and recordings. It may also hinder your TV to search for features like videos on demand. Click here to learn how to reset q box.

If these steps do not work, you may be dealing with a bigger problem. We advise you to ask for professional help and leave these problems to the experts. Aerialforce has Satellite TV Engineers who have years of experience in offering same-day satellite TV services.  Just search our site or contact us, and we’ll be there to assist you right away.

Get Fast-Service Aerial Repairs and CCTV Installations

A Comprehensive Guide for TV Antennas: How to Choose the Right Kind

Cord cutters spend years perfecting their access to free TV channels. The two ways you can achieve this by installing a satellite dish or a TV antenna/aerial. The TV antenna is the most affordable option, but because of the accessibility, it is tricky to navigate the market. How do you choose the right TV antenna for your home? Take note of the following information:

What Does A TV Antenna Do?

Your TV antennas catch signals from TV transmitters near you. They use different radio frequencies to carry digital content to your receiver. Your TV receives those signals and converts them into your favourite shows. Viola! Free channels without a monthly subscription. 

The TV antenna works with two different broadcasting frequencies: VHF (Very High Frequency) and UHF (Ultra High Frequency), however, that system of separate channels on different frequencies is not used in the UK anymore. Right now they use OFDM (Orthogonal Frequency-Division Multiplexing) to bundle channels in multiplexes (MUX) and send digital content through radio waves. The new system is a more efficient way to send channels, and it improves the number of channels you can receive. 

Analogue TV users, however, will not be able to receive digital terrestrial broadcasted shows and may need a setup box or digital TV. This rule also applies to people who want to watch HD channels. They need HD TV antennas and an HD TV set to be able to enjoy the format. It is a matter of matching the format of the content to the receiver. 

PRICE MATCH GUARANTEE!

Free Estimates for new installations

How Do I Select The Right TV Antenna?

With an overly saturated market, it is hard to find the right TV antenna. But make no mistake, these options work in your favour! The right TV antenna depends on a lot of factors. The set up of our home, the local terrain, the distance of the TV transmitters, and the type of TV you have are all variables you need to consider. 

Where Are You? Urban Vs Rural

  Identify your current location. Do you live in an urban area with tall buildings, compact living spaces, and lots of frequency traffic? The city has many things that can obstruct signal, but at the same time are relatively close to transmitters. You have to find the balance between enjoying strong reception but also deal with signal interference.

  Rural locations may deal with distance or obstruction issues. Cities may be similar, but the countryside has more variations. Forests, mountains, and hills you do not know what could make or break your reception. Even a tree beside your home can affect your TV antenna. Break down the unique issues of your home. You can use your postal code to see what you should be able to access Freeview. 

 TV Transmitters Near You

  The next thing you need to be aware of is the distance between you and the nearest TV transmitter. Search online for the ones in your immediate vicinity, take note of as many as possible. The signals you receive from TV transmitters vary. You may be close to Tower A, but also have a lot of interference from 4G, 5G, or tetra. Tower B that is a bit farther but has no obstruction, can work better for you. Plot these out and figure out the range you need to access the most of them while staying in the mileage of most TV antennas. 

 Please bear in mind that TV antennas that promise an excessive range, around 50 miles upwards without being an outdoor TV aerial, is most likely a marketing gimmick. It will not deliver the results they promise, and that could be a couple of pounds down the drain. 

 Indoor vs Outdoor TV Antennas

  Not everyone has the option to install an outdoor TV aerial. You could be in a flat or a house where landlord restrictions are king. If they do not want anything mounted on the roof, you have no other option but to get an indoor TV antenna. 

  For the people who have the option of choice, consider the antenna range you need and the space to install your aerial. If you need 50 miles or more, get an outdoor TV antenna and mount it on the roof. If you do not want to mount it on the roof because of safety issues, you can try to install it inside your attic. 

Your attic should be free from extra clutter. Those odds and ends crowding your attic can affect your TV aerial. Try to keep the TV antenna as close to the windows. Place it in the direction that has the least amount of obstruction outside. The height and less insulated walls make it easier to pick up signals, though aerials for attics cannot compare to those mounted on the roof.

 If you live close to a TV transmitter, an indoor TV antenna is good enough. From the old rabbit ears moved now and then to the thin, sleek versions that can stick to your windows, indoor aerials have come a long way in design. You can take your pick depending on your home layout. 

As a general rule of thumb, don’t fall for excessive ranges, but try to get more than the bare minimum required. Try to find that balance. You can check reviews about how different models perform with their promised range. 

What Is The Best Antenna For Free TV?

 There is no one-size-fits-all antenna for Free TV. You can get the most out of free channels when you pick up the best reception. The best reception needs the right angle and position. Amazon’s top pick for TV antennas is Easing’s Indoor TV aerial, and their pick of outdoor TV aerials is SLx DigiDome. However, the best seller listed on the site is Firmrock’s Indoor TV aerial. Both models have a 50-mile range and support digital TV. 

 Other top picks are Mohu ReLeaf HDTV antenna (or anything in their range) and AmazonBasics Indoor Flat TV antenna for indoors, and the Winegard Elite 7550 and the 1byone Amplified HDTV antennas for the outdoors. You can improve the output of these HDTV antennas by changing to an RG6 coaxial cable for good measure. 

What Channels Can You Get With A TV Antenna?

 There are over 70 channels available. You can check the Freeview’s TV guide for the channels available in your area and the schedule for the week. You can catch shows from BBC, BBC One, BBC Two, ITV, Channel 4, Channel 5, Quest, and Dave. You can get CBeebies, CBBC, Pop, and Ketchup TV for the children in your home. There are many channels available, and you could spend days exploring what is available in your area. 

How Do You Get A TV Antenna?

 TV antennas are easy to find you can find it from your local electronics stores. Or large chains like Amazon, Argos, and Currys. Models available may vary depending on the store, and the models you have researched might not be there. The prices of these TV antennas range from £ 10- £60, with outdoor TV aerials in the upper end. Check their online inventory or call ahead to ask about them.

 You could also opt to work with professional TV antenna installers like Aerialforce. We can provide top of the range models that come with a 1-3 year warranty. You get to have the added experience of our engineers and enjoy the best reception possible. 

Do TV Antenna Boosters Really Work?

When you are trying to improve your viewing experience, you can consider TV antenna boosters or amplifiers. Context is critical in using this device in the right way. Your TV antenna boosters do not give you more range. It does not improve your reception. TV antenna boosters are there to strengthen your existing signal which should be in the 50dB to 55dB, anything less is inferior and your booster will do nothing for you. 

 People who claim that the boosters don’t work, are merely using it for the wrong reasons. Boosters, when unnecessary, can ruin your viewing experience by amplifying false signals. The only time TV antenna boosters come into play are when you live far away or in areas with a lot of obstruction. Homes in the city may not need it outright, but homes in rural areas would benefit from having them. It is especially helpful in homes that use multiple devices.

 Some TV antennas come with these boosters in the kit. You can buy your boosters separately. Be wary about the quality of your antenna boosters, and try to stick to recognizable manufacturing brands to stay safe. If the ones from your local stores work fine, then you can go with it. If you do not receive the results you want, you might have a faulty device and better get a replacement. 

 Hopefully, you are now fully informed about TV antennas/aerials, and that this answers most of your questions. The best purchases are made when they are well-researched. Apply all the tips mentioned, and you could find the TV antenna that best suits your home! To ensure that you get the best signal reception in  your house, call the professionals like Aerialforce! We guarantee quality and fast service.

What is Motorised Satellite Dish?

Satellite dishes and aerials have been the backbone of free entertainment for years since its introduction to the TV industry in the 70s. It has adapted to the needs of the market. In the beginning, satellite dishes had poor reception and shoddy picture quality. The dishes were sensitive and filled with technical issues that needed to be consistently troubleshot. The demand for better quality and more shows made the mobile version increasingly popular over the years. 

What Is A Motorised Satellite Dish?

A motorised satellite dish builds on top of the existing model. The components are a dish/ reflector, feed horn, LNB, and a receiver. The only difference between the two? Mobility. The added motor helps change the direction of the satellite dish. It provides more range, and, by extension, more satellites and content. 

Mobility solves the problem of poor reception and limited access to broadcasted channels. It also takes care of the everyday struggles of manually adjusting the satellite dish. While it made the use of satellite dishes easier, the important aspects haven’t changed. 

The initial installation continues to play an important part. The motorised element allows for more freedom. You can continually hunt for new channels, and never reach the end of it. You might be surprised at what you could find. 

PRICE MATCH GUARANTEE!

Free Estimates for new installations

How Does A Motorised Satellite Dish Work?

A motorised satellite dish works in the same way that a regular one does. The signal from the satellite would hit the reflector/dish. Then it would bounce off the dish and head towards the feed horn. From there, the LNB converts the signal and sends it to the receiver inside the building. From the receiver, it goes to your TV set where it displays moving images for your watching pleasure. 

For the motorised aspect, you could use the sat finder to control the direction of the satellite dish. You could watch a couple of shows and reset your system when you are finished. You won’t have to choose between two different satellites and could switch between the two when you want. 

You do not need a separate power supply for your motor. That additional feature was only applicable to really old models in the early 2000s. The power from the coaxial cord is enough to support the engine. 

How Do You Set Up A Motorised Satellite Dish in the UK?

There are plenty of challenges when setting up your motorised satellite dish at home. However, nothing ventured, nothing gained, right? The materials and instructions might not be the same, but you could use the following as a reference. Consulting the manufacturer’s manual should be helpful. 

Materials You Need

You could go about the materials in two ways: a complete kit or individual parts. If you have decided to get it by parts, there are three components you should have: a motorised mount, satellite dish, and a receiver. If you chose the kit, it should have everything included. 

Assemble The Parts

The first thing you should assemble is your satellite dish. The dish attaches to the mount and screws into place. The next piece is the LNB. After you have created the satellite dish, install your motor to your post. Level your post before you install the motor. Once the engine is in place, you can connect it to the satellite dish mount. 

Azimuth Angle

Your motorised satellite dish should be pointed at the azimuth angle. The azimuth is the angle between a celestial body, or in this case, your satellite, and the North ( 0 degrees), measured clockwise along the plane (from left to right). There is no fixed azimuth angle. It depends on your location. 

You can search for azimuth angle calculators online or manually do it with a compass. If this is too difficult, you can try a sat finder and adjust to the coordinated given or hire a professional. Satellite dishes are sensitive, and they need to be as accurate as they can be or else the quality of your Freesat channels will suffer.  

Elevation Angle

After you find your azimuth angle, you need to find your elevation angle. It is similar to the azimuth, but instead of your longitude being zero, it is your latitude, and the angle is from our plane moving up towards the celestial body, or satellite. 

After you finish these steps, you can scan for channels and finetune your connection. You can also test out your motor and see what other satellites are near you. Count yourself lucky if you can enjoy more than two with good quality!

How Does Dish TV Work?

Dish TV channels follow this chain: from programming source to the broadcast centre, from the broadcast centre to the satellite, and then to your satellite dish and TV. Now channels are packaged together in a bundle to compete with other types of TV like aerial, cable, and internet subscriptions. Every country with satellite TV has its own units. When countries are close together, you can catch these signals. It is unavoidable for them, and an unexpected perk that people have been enjoying for years. 

Can I Pick Up Foreign Channels?

Motorized satellite dishes can pick up more than the static ones. It is possible to pick up foreign channels, or at the very least, channels that aren’t for your immediate area. If you live in the South of the UK, you can pick up signals from France and Germany. The Astra 1 at 19 degrees east, Eutelsat Hot Bird at 13 degrees east, and Atlantic Bird 3 at 5 degrees west, these are some of the satellites you might be able to pick up. They cover French, German, Italian, and Pan-Asian shows, though this may vary. 

If you live in the North of the UK, it is a bit trickier. You need to have a bigger satellite to pick up these signals. If people in the South can get by with a zone one satellite, the North needs a zone 2 version, nothing less than 63 cm can do the trick. 

What Satellite Dish Does Dish Network Use?

Dish Network uses Echostar XIV and XV, Anik F3, and Ciel-2 satellites as of now. These satellites are subject to change over time. Many Brits who have spent time abroad wonder if they can use Dish Network in the UK. Dish Network, also known as DISH, is an American satellite TV company. Sadly, there is no way you can connect to these satellites. Their units are below the UK horizon, and it is impossible to get a usable signal. 

Dish Network considered expanding to the UK, but as of now, nothing has come of negotiations. It does not seem like it would change any time soon. You may have to settle for online streaming subscriptions for US-specific content. 

How To Troubleshoot Your Motorised Satellite Dish?

In the event, your motorised satellite dish doesn’t work as well as it should, try to diagnose the problem. Are there any changes in the local environment? A taller tree, a new building, or massive signboards are things that can obstruct your signal. If this is the case, use your motorised satellite and find a new position that is clear. 

When the environment has no issues, consider the weather. Was there a storm that could have damaged parts of your set up? Inspect the model and try to repair it the best you can. 

Now environmental issues are not the only cause. When nothing out of the ordinary happened, consider replacing your LNB. There could be damage with how it filters out signals. 

When you find yourself at wit’s end, hire professionals like Aerialforce to install or diagnose your motorised satellite dish. Unlike furniture, satellites are not that simple to fix. The stress from finding the right angle and position can easily overwhelm and dishearten. 

Your motorised satellite dish is out to improve your entertainment at home, not to cause you long term stress. It is an investment that you could splurge on and get advice from experienced engineers in the business. When you have your motorised satellite up and working have fun with the system. Explore what the satellites have to offer and take note of your favourite ones. When done right, your Freesat channels can be quite enjoyable.