fbpx

How To Make a DIY TV aerial or Satellite Flying Lead?

DIY TV aerial or Satellite Flying Lead

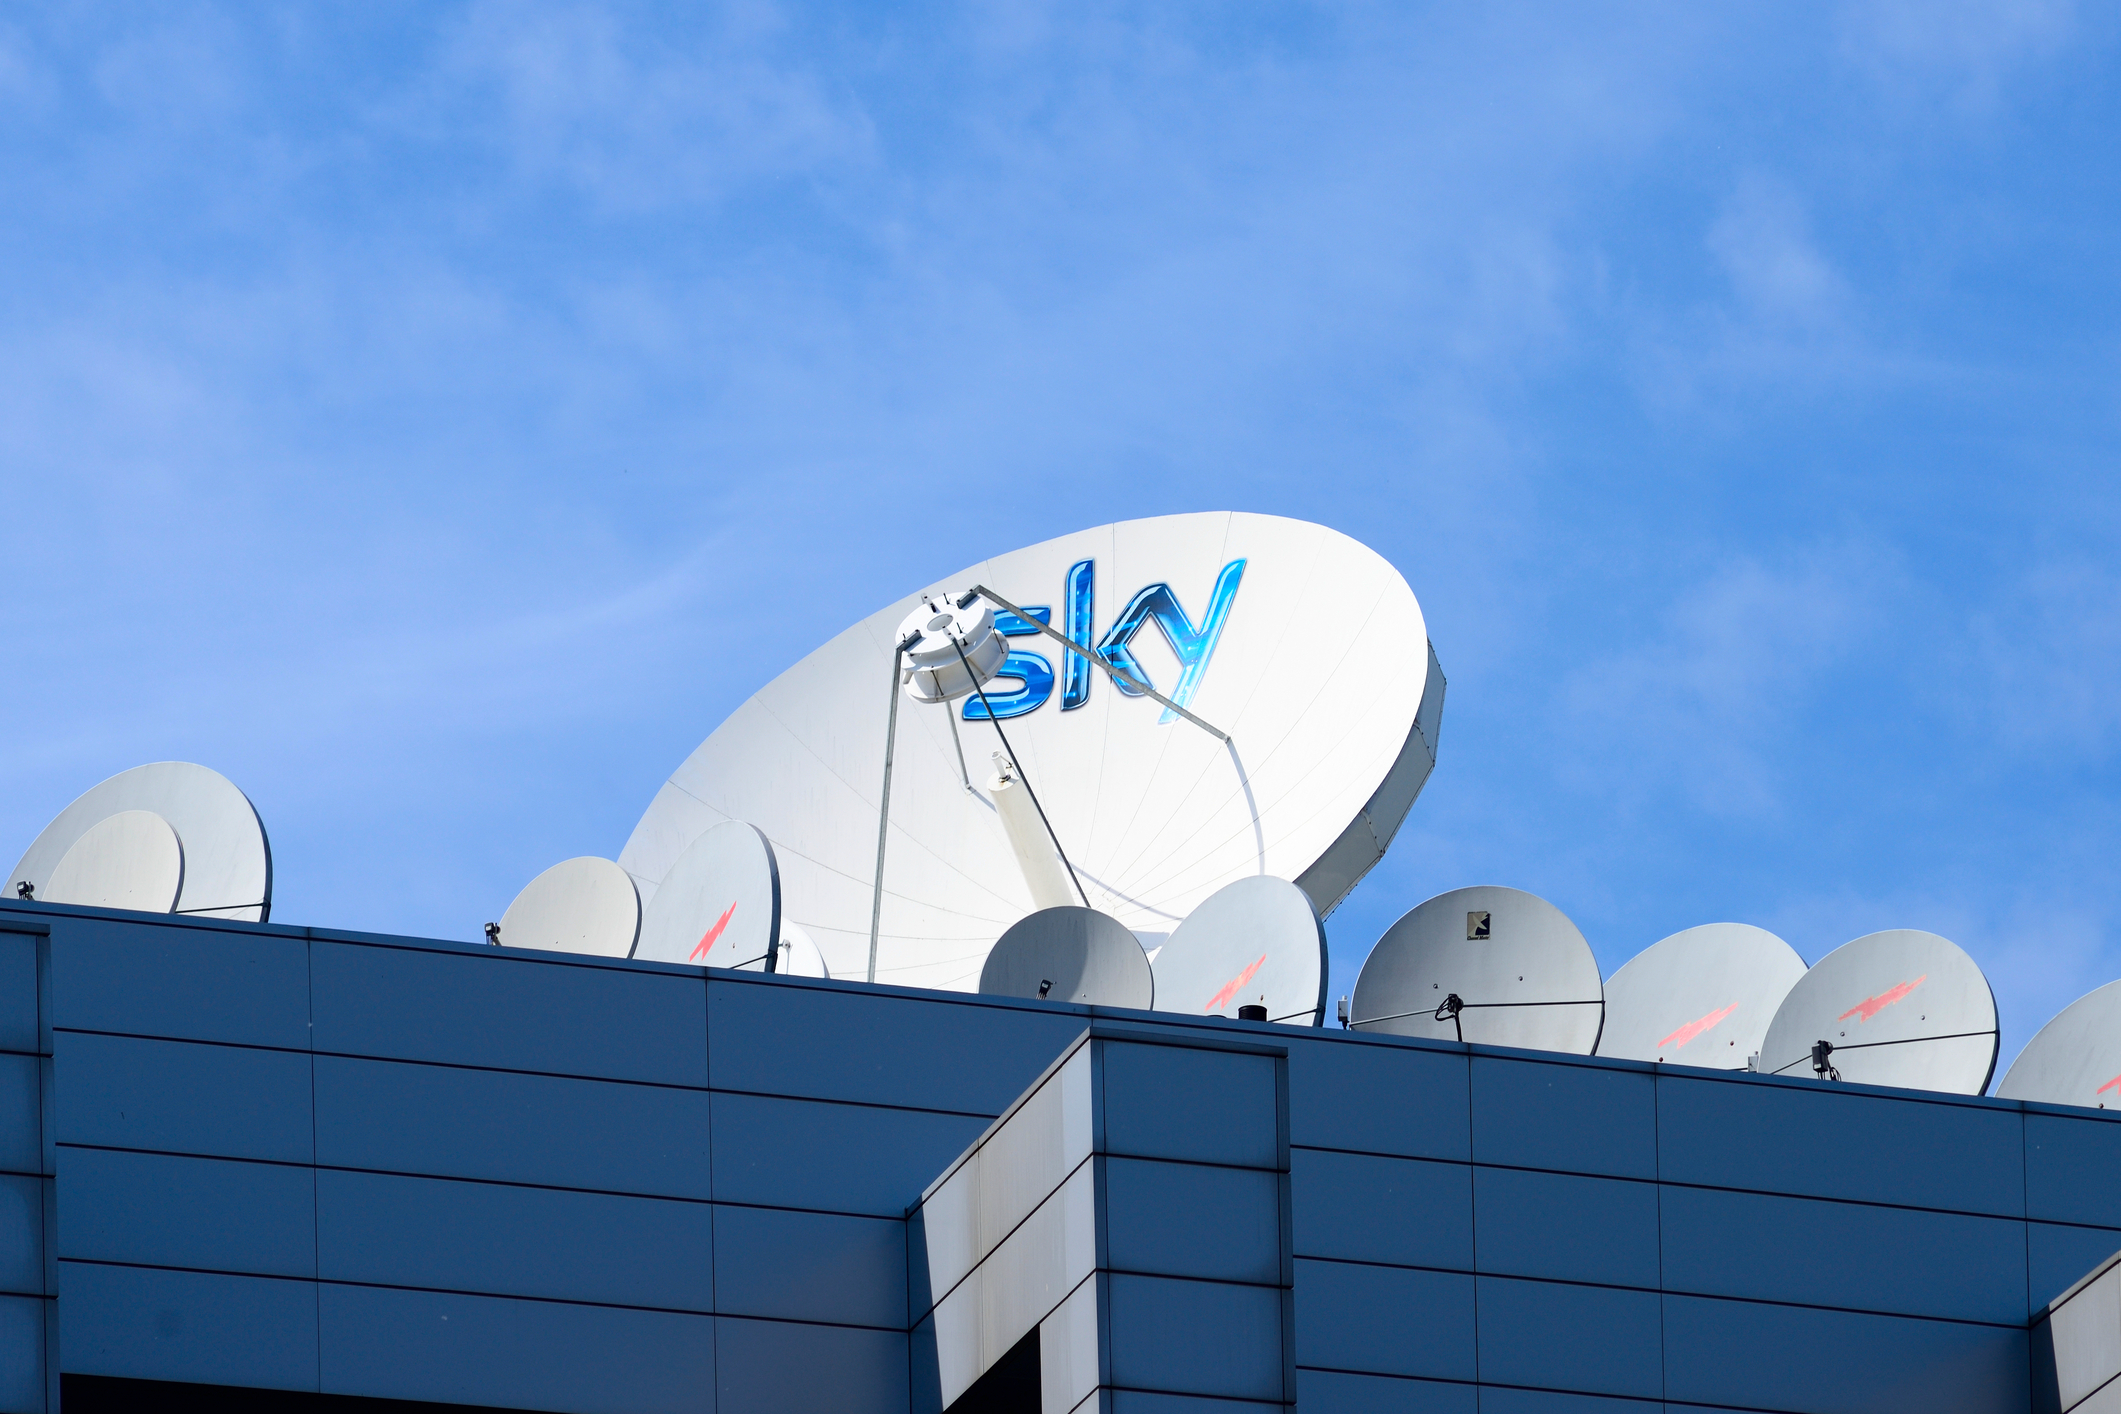
Having a TV antenna installed for your television is a great way to enjoy the perks of digital entertainment! With this equipment, you can receive satellite signals from television stations, and have the chance to watch the news and even your favourite TV shows! If you wish to buy one, you should also know how to choose the right kind of TV antenna.

Although, if you are on a budget and would instead use a low-cost alternative, not to worry because Aerialforce provided simple steps on how to make a satellite flying lead to get free channels!

COAT HANGER TV ANTENNA

This simple and easy DIY project can be done in any house around the UK. You won’t need to buy new materials, because you can find coat hangers and paperclips lying around in your home!

Materials you need:

  • emery board/ sandpaper
  • used metal coat hanger
  • scotch tape
  • small piece of a metal paper clip

Best CCTV installers and Aerial engineers near you

Steps:

  1. Scrap off the layer of your coat hanger by rubbing the sandpaper or emery board on the surface of the coat hanger. Keep rubbing the sandpaper or emery board until the coat hanger becomes bare metal.
  2. Uncoil the hook of your coat hanger and twist it until the wire joint becomes open and unbent.
  3. Next is to get the small paper clip and bend it until it turns into an S-shaped. The short end must be bent at a 90-degree angle while the bent portion should be 1/4 inch long. You will plug this section to the coaxial cable connector on your TV.
  4. Behind your TV, you will find the coaxial connector. Once you see it, place a scotch tape over the end of the coaxial connector to avoid the paperclip from shorting the centre and outer rim of the connector.
  5. Get the small S-shaped paperclip and plug the short 90-degree bent section of it into the centre hole of the coaxial antenna connector.
  6. With the uncoiled coat hanger, connect it onto the metal paperclip.
  7. For this to work, set up your TV menus and select ‘antenna input’. After, this will automatically scan for available channels.

DIY HDTV ANTENNA

If you are up for a more complicated house project, you’ll probably like this next DIY antenna!

Materials you need:

  • 2 x 3 inches wooden board with a length of 22 inches
  • 18 screws (not deeper than your choice of wood)
  • Balun – is a type of transformer used in a television antenna to balance signal output.
  • Copper Wire
  • Disposable Grill or any aluminium window screen
  • Pencil
  • Power drill
  • Screwdriver
  • Tape Measure
  • Wire Cutter

Steps:

  1. Lay the wooden board horizontally and mark lines from left to right with a pencil at the 2-inch mark, the 7.25-inch mark, the 12.5-inch mark, and the 17.75-inch mark. Once done, draw a 1-inch gap down the middle of the marked lines to have eight intersecting points. These points will be your guide holes for later.
  2. Get the copper wires and measure it to 14 inches and cut eight portions of the same measure.
  3. Each wire must be bent halfway making it 7 inches long for each side. By doing this, the wire must be in the shape of a ‘V’, while the ends must be 3 inches apart. Note: these measurements are crucial for the antenna to perform well!
  4. Drill the eight guide holes (from step 1) and attach the centre (bent portion) of the V-shaped wire to the board using the screws and washers. After, each V-shaped wire must extend and point outward from the board. Your board must look like it grew several pairs of legs.
  5. For the following step, screw the two disposable grill tray behind your antenna using two screws. Then, from the centre (bent portion) of the copper wire, join them together with a wire by crisscrossing (‘X’ shaped figure) the left and right end section, and leaving the middle part parallel. Unlike the left and right end section, the central part’s wires must not touch each other.
  6. Strip a segment of insulation from the two middle wires so that attaching it to the balun will be easy. If you are not sure how to do this, there will be an instruction that comes with the balun after your purchase.
  7. Attach the balun to the two middle wires, and use a coaxial cable to have the antenna connected to your HD television.
  8. As a final step, you will need to find the nearest TV transmitter to align your homemade antenna.

Get Fast-Service Aerial Repairs and CCTV Installations

PVC PIPE SATELLITE FLYING LEAD 

This DIY satellite flying lead is best to put outside of your home! If you have enough space for this PVC antenna, this will be a perfect project for you.

Materials you need:

  • Copper Tubing
  • Electric drill
  • PVC pipe
  • Screwdriver
  • Tape Measure

Steps:

  1. Using the 1/2 inch copper tubing, bend a half-circle in a 26-inch diameter and add 1 inch extra on each end. Press each end and turn them outwards. After, form another half-circle with the same measurements and turn it inwards.
  2. Add a new piece of 1/2 inch PVC to each connection to bolt the pressed edges to two of the PVC ends for the middle to fit into a slot supporting the entire body. You will see that there is no electrical contact between the two pieces of copper tubing except for the 300 ohms matching transformer.
  3. Dart the cross to a 2 inch PVC end cap and use a lock washer or double nuts to tighten its grip. After, stick the cap to a 20-foot piece of 2 inch PVC pipe.
  4. The next step will be to attach the 300-ohm matching transformer to the two pieced copper tubing. Link the cable to the transformer, tape and run down the 2 inch PVC pole.
  5. Then, shove a piece of pipe to the ground and set the antenna pole over it and securely put it above levelling your roof. If you go higher than 20 feet, you will need to use guy wires. Also, if you used a metal pole, make sure to have it grounded to the ground rod with the use of your electric meter.

With these simple homemade antennas, you can get free tv channels in your flat without the expensive cable subscription. If you like to try out these projects, feel free to work on it!

Be advised that these DIY antennas can be poor in quality especially when you live far away from broadcast television stations. However, this list of projects is a creative and cheap way that works!

Despite not getting high over-the-air receptions, good quality pictures, and the best tv signals, these DIY antennas can make your tv experience much better compared to not having one.

Although, if you want to get unlimited tv channels for your home, you may want to hire professionals like Aerialforce engineers to do a TV Aerial installation. You’ll surely get high-quality videos, strong TV reception, and good cable service.

Need professional help? Call Aerialforce now for same-day installations!

How Much Is Aerial Installation in Manchester?

manchester

Manchester is one of the many places where a lot of people choose to use aerial TV for their television experience. Manchester’s location and geography is ideal and relatively great for enjoying high-quality signals whether it’s for Freeview, Sky, or Freesat. 

Consequently, many customers avail satellite and aerial services in Manchester, including aerial installations and aerial repairs. If you’re ever planning on having a satellite or aerial installation and you live in Manchester, availing aerial installation Manchester services is the best way to go! While you may get cheaper quotes from outside, you would have to pay for their transportation costs and of course, there will be a long wait. Local aerial installers can attend to your property within the day.

Availing aerial installation manchester services is a great choice as it ensures you excellent quality of service. If you live in Manchester, aerial services are one call away thanks to Aerialforce, saving you from the stress brought by the installation of a TV aerial.

  1. Standard Price for TV Aerial Installation Services
    • What Defines a Standard Installation?
    • Factors That Affect Installation Costs
  2. Why is it Better to Hire Professionals for TV Aerial Installation in Manchester
    • DIY Aerial Installation Can Cause You to Spend More
    • Doing Aerial Installations on Your Own is Extremely Risky
    • Knowing the Best Type of TV Aerial in Your Area in Manchester Can Be Tricky
    • Manchester Professional Engineers Know Best about Aerials Manchester
  3. Other Services You Can Avail Alongside Aerial Service

If you want to estimate the prices first before you go call and avail the services of professional engineers and installers, you came to the right place! Many factors may affect services for installation of aerials Manchester. Here, we provided you with a guide on the prices of installation services in Manchester and why availing such services is actually cost-efficient!

Best CCTV installers and Aerial engineers near you

Standard Price for TV Aerial Installation Services

There are definitely many factors that may affect the price of installation services in Manchester. Cost of installations may vary from one location to another. Just like in any other products, companies will offer different costs or rates for their services. Still, there is a standard cost for these kinds of service.

What Defines a Standard Installation?

The cost of installations, first and foremost, may vary based on the installation requirements. The more complicated the installation needs to be done, the more costly it can get. Most companies have a standard where they can base the price of the installations on. 

The common standard for aerial services and installation includes installing an aerial up to 32 elements in size. A standard installation also involves a TV aerial installed on a chimney stack or wall with the need of a bracket 13 inches in size at most.  The cable should externally run the new one room and should not exceed 18m in length. The property should also be two stories in height at most. Finally, the installation can be completed in under two hours.

The industry standard cost for professional installation of TV aerials is £250. This cost mostly depends on the materials (which is around £150) and the cost of work/labour (which is around £100). Of course, the actual cost will depend more on many factors, but this could still be useful enough if you’re just estimating the cost of installation services. Just compare your situation to the standard, and you can get a rough estimate of the prices. To get a more accurate price, feel free to contact or call an aerial company and ask for price estimations.

Factors That Affect Installation Costs

Materials and work/labour are the most significant factors that affect TV aerial and satellite dish installation costs. However, these are just two of the many variables that affect the prices of digital TV aerial services in Manchester. The location of your property also plays a big part. If your home’s location in Manchester has a strong reception of signals like Freeview signals or Freesat signals, then professionals can finish their work quicker and much easier. 

On the other hand, if your home’s location in Manchester has weak reception of TV signals such as Freeview or Freesat, then professionals may work double-time to install the aerial. The cost of TV aerial services and installations may also become more expensive as better materials are required to get better quality of Freeview and Freesat signals. For instance, higher gain aerials, better amplifiers, or bigger masts may be required to improve the quality of such signals.

The setting of your home also affects the difficulty of installation of TV aerials. For example, if you prefer attic installation rather than a rooftop installation, then the price may get higher depending if there is a need to introduce a new electric outlet, need to hide wires, etc. The weather conditions will also definitely affect the cost of TV aerial services.

Aside from the materials, the TV aerial itself is obviously a big factor on the cost. There are different types of TV aerials, and the best type of digital aerial depends on your location. TV aerials as well as satellite cost differently. The method of installations may also depend on the type of digital aerial. The three main kinds of TV aerials: indoor aerials, outdoor aerials, and loft aerials. We will not go into detail about this one, but if you want to know more and determine the best TV aerial for your home, then read our article!

Get Fast-Service Aerial Repairs and CCTV Installations

Why is it Better to Hire Professionals for TV Aerial Installation in Manchester

You might be thinking that installing your TV aerial on your own is better and cheaper. After all, why bother hiring people for aerial installation services in Manchester when you can just Google a DIY TV aerial installation?  Well, there is a reason why many customers still avail aerial services in Manchester. 

DIY Aerial Installation Can Cause You to Spend More

Yes, you read that right. You may end up spending more money by doing a DIY aerial installation. TV aerial installation, and any other installations like satellite dish installation and TV installation, is best left to the professionals. Aerial installation may look simple at first, but aerials and satellites are very delicate and sophisticated objects that should be installed carefully.

If you don’t install your aerial and satellite system the right way, you’ll end up with poor TV signal reception. A wrong installation or careless mistake may break your aerial or satellite causing you to buy another one. Moreover, satellite and aerial repairs due to mishandling may be more expensive than the actual installation itself. 

Doing Aerial Installations on Your Own is Extremely Risky

To get the best signal reception in Manchester, satellites and outdoor tv aerials are usually recommended. Satellites and external or outdoor digital TV aerials Manchester are usually installed in a high area. Installing one may need going to the roof of your property or reaching a high spot on the wall of your home using a ladder. 

If you don’t have the right skills and equipment, you may not just end up spending money for aerial repairs. You may also end up paying hospital bills for accidental injuries you incur on yourself. Go the safer route and contact Aerialforce instead.

Knowing the Best Type of TV Aerial in Your Area in Manchester Can Be Tricky

There are several types of digital TV aerials and satellite systems in Manchester. In some areas, having an indoor digital TV aerial may be the best choice for optimal signal reception. On the other hand, many areas in Manchester require external or digital TV aerials for the best signal reception. These are just some of the many types of digital TV aerials. Satellite systems may even be a separate discussion.

Buying the most expensive TV aerial doesn’t guarantee high quality signal reception in Manchester. If you get one without professional advice or help, you may end up wasting money as your TV aerial or satellite is not cost-efficient.

Manchester Professional Engineers Know Best about Aerials Manchester

Asking for professional help and services for your digital aerial installation is the best choice. Professional engineers, thanks to their years of experience, offer you the best services to give you the best viewing experience at home. 

A TV aerial engineer is also skilled and well-knowledgeable about the different aerials Manchester choices and which one is the best for your home. Aerial services from professionals also usually come with other services such as TV installation, Freesat installation, and repairs, so if you ever need help, give Aerialforce a call!

Other Services You Can Avail Alongside Aerial Services

Aerial engineers have years of experience in satisfying customer’s aerial and digital TV needs. Aside from aerial installations in Manchester, they also work to offer different services to provide you with the best digital television experience. People who need help with their TV aerials also usually ask for help in their Freeview, Sky Magic Eye, or Freesat Installation. 

Since Freeview usually comes hand in hand with TV aerials, professional aerial engineers in Manchester also offer to optimize their customer’s television system to receive the best possible Freeview signals and get the best Freeview television channels in Manchester. Problems regarding the quality of Freeview signal reception as well as missing Freeview channels are also solved by these professionals in Manchester

Aside from Freeview, professionals in Manchester can also offer their service in other installations such as satellite dish installation and Freesat installation.  Satellite Dish also comes hand in hand with Freesat, so many also avail the service of Freesat installers. Unlike Freeview which usually works with TV aerials, Freesat works via Satellite System. 

You can get over 200 channels in Freesat with your satellite dish, as opposed to the Freeview’s 70 channels. Hence, Freesat is great for getting a few extra channels via satellite. However, the television experience can still feel lacking for some customers because of the limit on channels. Other customers today who are not satisfied with Freeview or Freesat reception avail the service of Sky and its magic eye.

Aerialforce engineers in Manchester can provide help installing brackets for your TV wall and help you with TV wall mounting. They can also fix your coax cable if it needs fixing and do repairs on other parts of your TV system such as your antenna, tuner, etc. Aside from cable, TV aerial, satellite dish, and any other digital television-related service, professionals can also provide service in installations of CCTV systems at your home. Contact one and they will be there as soon as possible.

There are definitely different kinds of television service you can avail in Manchester, so feel free to call and contact us through phone or email. If you ever need assistance for any aerial, satellite dish, Freeview, Sky, and problems of the like, contact Aerialforce at 0330 173 2901 or book online now!

1080i vs 1080p

Why is it Better to Hire Professionals for TV Aerial Installation in Manchester You might be thinking that installing your TV aerial on your own is better and cheaper. After all, why bother hiring people for aerial installation services in Manchester when you can just Google a DIY TV aerial installation?  Well, there is a reason why many customers still avail aerial services in Manchester.  DIY Aerial Installation Can Cause You to Spend More Yes, you read that right. You may end up spending more money by doing a DIY aerial installation. TV aerial installation, and any other installations like satellite dish installation and TV installation, is best left to the professionals. Aerial installation may look simple at first, but aerials and satellites are very delicate and sophisticated objects that should be installed carefully. If you don't install your aerial and satellite system the right way, you’ll end up with poor TV signal reception. A wrong installation or careless mistake may break your aerial or satellite causing you to buy another one. Moreover, satellite and aerial repairs due to mishandling may be more expensive than the actual installation itself.  Doing Aerial Installations on Your Own is Extremely Risky To get the best signal reception in Manchester, satellites and outdoor tv aerials are usually recommended. Satellites and external or outdoor digital TV aerials Manchester are usually installed in a high area. Installing one may need going to the roof of your property or reaching a high spot on the wall of your home using a ladder.  If you don't have the right skills and equipment, you may not just end up spending money for aerial repairs. You may also end up paying hospital bills for accidental injuries you incur on yourself. Go the safer route and contact Aerialforce instead. Knowing the Best Type of TV Aerial in Your Area in Manchester Can Be Tricky There are several types of digital TV aerials and satellite systems in Manchester. In some areas, having an indoor digital TV aerial may be the best choice for optimal signal reception. On the other hand, many areas in Manchester require external or digital TV aerials for the best signal reception. These are just some of the many types of digital TV aerials. Satellite systems may even be a separate discussion. Buying the most expensive TV aerial doesn't guarantee high quality signal reception in Manchester. If you get one without professional advice or help, you may end up wasting money as your TV aerial or satellite is not cost-efficient. Manchester Professional Engineers Know Best about Aerials Manchester Asking for professional help and services for your digital aerial installation is the best choice. Professional engineers, thanks to their years of experience, offer you the best services to give you the best viewing experience at home.  A TV aerial engineer is also skilled and well-knowledgeable about the different aerials Manchester choices and which one is the best for your home. Aerial services from professionals also usually come with other services such as TV installation, Freesat installation, and repairs, so if you ever need help, give Aerialforce a call! Other Services You Can Avail Alongside Aerial Services Aerial engineers have years of experience in satisfying customer's aerial and digital TV needs. Aside from aerial installations in Manchester, they also work to offer different services to provide you with the best digital television experience. People who need help with their TV aerials also usually ask for help in their Freeview, Sky Magic Eye, or Freesat Installation.  Since Freeview usually comes hand in hand with TV aerials, professional aerial engineers in Manchester also offer to optimize their customer's television system to receive the best possible Freeview signals and get the best Freeview television channels in Manchester. Problems regarding the quality of Freeview signal reception as well as missing Freeview channels are also solved by these professionals in Manchester Aside from Freeview, professionals in Manchester can also offer their service in other installations such as satellite dish installation and Freesat installation.  Satellite Dish also comes hand in hand with Freesat, so many also avail the service of Freesat installers. Unlike Freeview which usually works with TV aerials, Freesat works via Satellite System.  You can get over 200 channels in Freesat with your satellite dish, as opposed to the Freeview's 70 channels. Hence, Freesat is great for getting a few extra channels via satellite. However, the television experience can still feel lacking for some customers because of the limit on channels. Other customers today who are not satisfied with Freeview or Freesat reception avail the service of Sky and its magic eye. Aerialforce engineers in Manchester can provide help installing brackets for your TV wall and help you with TV wall mounting. They can also fix your coax cable if it needs fixing and do repairs on other parts of your TV system such as your antenna, tuner, etc. Aside from cable, TV aerial, satellite dish, and any other digital television-related service, professionals can also provide service in installations of CCTV systems at your home. Contact one and they will be there as soon as possible. There are definitely different kinds of television service you can avail in Manchester, so feel free to call and contact us through phone or email. If you ever need assistance for any aerial, satellite dish, Freeview, Sky, and problems of the like, contact Aerialforce at 0330 173 2901 or book online now!

As TV and media technology grows, there are just so many terms that can leave you confused if you are not familiar with them. Some terms such as 1080p and 1080i are often used interchangeably. People who are not so techy may not care enough about such terms, but there is actually a big difference among them that may impact your purchasing and watching decisions. Here, we provided you with a simple explanation of the difference between 1080i and 1080p.

  1. Resolution
  2. 1080i vs 1080p: What’s the Difference?
  3. 1080i vs 1080p vs Other Resolution (720 p, Ultra HD, 4k, etc.)

Resolution

1080i and 1080p have their fair share of similarities and differences. Let’s start with their similarities which is the resolution. Resolution refers to the number of pixels that are displayed on the TV screen. These pixels are like tiny dots that compose the images displayed on a TV.

One common misconception is that 1080i has a lower vertical resolution than 1080p. This is false as the resolutions of both 1080i and 1080p are the same which is 1920 x 1080 pixels on a typical 16:9 widescreen. 1920 pixels by 1080 pixels means that 1080 lines of pixels are displayed on the screen where each horizontal line contains 1920 pixels.

1080i vs 1080p: What’s the Difference?

If both 1080i and 1080p have similar resolutions, where do they differ? The main difference between the two is the way they display the pictures on TVs. Particularly, 1080p uses a frame to display a picture while 1080i uses a field to display a picture.

Difference Between a Field and a Frame

An important process in data transmission is scanning, which is the way the lines in pictures or videos are written across the screen. The lines of pixels are written many times per second, and the method of scanning depends on whether a frame or a field is used.

In video-related fields, a frame refers to a still image that is part of a complete moving picture. If you are familiar with the term fps or frames per second, it just essentially refers to the number of frames or still images displayed in one second.

On the other hand, a field contains half of the lines of the frame: one half containing the even lines while the other half containing the odd lines. Odd lines simply mean that all the 1st horizontal line, 3rd horizontal line, 5th, 7th, and so on are part of one field while the even lines include the 2nd, 4th, 6th, 8th, and so on.

Best CCTV installers and Aerial engineers near you

Progressive Scan vs Interlaced Scan

So what do fields and frames have to do with HDTV resolutions? 1080p resolutions are frame-based that use a scanning method called the progressive scan. In fact, the “p” in 1080p refers to “progressive” not “pixels”. 1080p displays the lines of a picture progressively from top to bottom. These pictures are then displayed in a 1080p video in an extremely fast motion every short time.

The frame rate for TVs in pal countries is 25 frames per second while the frame rate for TVs in NTSC countries is 30 frames per second. For cinematography, the typical frame rate is 24 frames per second.

On the other hand, 1080i resolutions are field-based that use a scanning method called the interlaced scan. The “i” in 1080i also refers to “interlaced”. As opposed to progressive scan, interlaced scan displays the lines of a field (which is half of an image) at an instant. 1080i display the field with the odd lines first at an instant followed by the even lines. These two different fields are “interlaced” to look or appear as a single picture in the viewer’s eyes. This is done by displaying them in an extremely fast motion every short period of time.

A 1080i video typically uses a rate of 50 fields every second for TVs in PAL countries and a rate of 60 fields per second for TVs in NSTC countries.

Advantages and Disadvantages of Progressive and Interlaced

You might be wondering what is the point of dividing an image into two. First, the interlaced scan uses less bandwidth. Bandwidth, in the simplest terms, just refers to the amount of data (or in this case image) you can send or transmit at a time. Delivering 1080p with great picture quality uses a higher amount of bandwidth. Thus, it can get very expensive. Many cable companies use 1080i to compress data significantly and get more bandwidth.

A disadvantage though is that you may get to see slightly pixelated colour gradations in some scenes caused by the slight mismatch in the interlacing of the fields. This is more evident when you’re watching a video that displays quick motion such as a sports broadcast or an action movie. The video delivered by the cable company is still high definition, but it’s not just as good as it’s meant to be.

Progressive scan or 1080p is generally better in displaying high-quality videos in TVs. The frames in a 1080p video look sharper, better, and more defined than 1080i. However, due to the cost, there’s really not a lot of videos you can get to watch in full HD. 

Other TV channels reduce the quality of their videos to 720p for cable companies to be able to deliver them in 1080i. Blu-ray is one of the most popular formats in watching HD content. Many video formats from streaming sites such as YouTube and Netflix also support full HD content.

1080i vs 1080p vs Other Resolution (720 p, Ultra HD, 4k, etc.)

Clearly, there are different advantages and disadvantages of each resolution. Most TVs and boxes from cable companies such as SkyHD allow you to switch from one resolution to another. The best way to determine which resolution is the best is to consider these biggest factors: 

  • the format of the video you are watching
  • the type of video content
  • and the size of your HDTV.

If the format of the video you are watching supports full high definition such as blu-ray or the Internet, then it is better to use progressive or 1080p. 1080p is also best in watching videos in the case where resolution is more important than fluid motion. If the fluid motion is more important to see than the resolution, watching in 720p is best. If you need to see high-definition TV, 1080i is often used. If it is a standard-definition TV, 720p is best which you can convert to 576i or 480i.

It is important to note that the difference between the higher resolutions will only really be noticeable on larger screens. Even the difference between 720p and 1080p may not be clear when you’re watching on a relatively small screen. 

The two higher resolutions, Ultra HD and 4K, are best if you have a very large HDTV screen. However, if you have a small screen, it might be better to stick to a lower resolution such as 720p.

Are you having problems with your signal reception? Contact Aerialforce now and we’ll come to your doorstep on the same day of your call! Aerialforce provides urgent freeview aerial installations and repairs to ensure that your watching experience is never hindered!

Door Lock Types

door lock

Door locks play a crucial part in providing security for your family and your belongings. Just as there are many different types of doors, there are also several types of door locks. Knowing the best type of lock for a specific door is important to ensure the appropriate level of security. Generally, you would want to have the best locking system for your external doors and probably just a simple lock for inside doors and other simple doors like the cabinet or the toilet. Here, we provided you with a guide about the different types of locks to help you decide which one to buy and use for your doors.

  1. Main Parts of a Door Lock
    • Cylinder
    • Bolt
    • Strike Plate 
  2. Different Types of Door Lock
    • Mortice Locks
    • Multi-Point Locks
    • Night Latch
  3. Other Useful Door Locks
    • Euro Cylinder Locks
    • Hand Levers
    • Barrel Bolt
    • Chain Lock
    • Padlock
    • Electronic Locks

Best CCTV installers and Aerial engineers near you

Main Parts of a Door Lock

To understand the difference between the different types of locks, it is good to know first the different parts of a lock. A door lock generally has three main parts: the cylinder, the bolt, and the strike plate.

Cylinder

The cylinder is the part of the lock where you insert the key. It is essentially the section that brings the “locking mechanism” to your locking system. Inside the cylinder are several pins that move when the key is inserted. All of the pins inside the cylinder will move only if the key fits the cylinder correctly. The lock will then unlock once the key reaches the last pin, allowing you to move the bolt and open your door. The lock will remain locked if the key does not fit the cylinder correctly.

There are two categories of the cylinder lock. One is the single-cylinder which only has space for a key on one side. The key side is on the external part of the door, while the other side is a knob or a handle that you can lock from the inside of the door. The other one is the double cylinder. Double cylinders do not have a single knob. To lock and open doors using double cylinder locks, you need a key on either side of the door. You can usually find double cylinders in places where you don’t want anyone to be able to lock the door from the inside without a key.

Bolt

Bolts are the part of the door lock that you can move once the key fits within the cylinder. It is the part that moves in and out of the carved-out part of the door frame. There are two common types of bolts: the deadbolt and the spring bolt

A deadbolt is a locking mechanism that cannot be moved without the correct key. This means that, for a deadbolt, you need to have a key to open the lock before you can move the bolt. On the other hand, spring bolts have a spring within that allows the bolt to retract once it touches the door frame or the lip of the strike plate. The bolts will then automatically extend back to the carved-out part once the door fully closes.

Deadbolt provides more security than the spring bolt, but a deadbolt requires you to always have a key with you. Spring bolts are better than a deadbolt for people who forget their keys most of the time. Spring bolt is ideal for doors that need to be closed but do not need to be locked all of the time.

Strike Plate

The strike plate is the piece of metal attached to the door frame. It holds the door closed once the bolt fully extends to the hole of the strike plate. Strike plates usually come with two holes where it can be screwed to the door frame, making it easy to attach as well as replace when it gets damaged.

Different Types of Door Lock

Choosing the right type of door lock is essential for your security as well as convenience. Additionally, when applying for home insurance or looking for home insurance deals, you will also usually be asked what type of locks you have fitted on your outside doors and windows. 

If you have the home insurance industry approved locks fitted on your doors, you could get a discount and may even save a lot of cash on your home insurance premiums. Otherwise, you may find yourself paying a higher premium for your home insurance. Thus, we listed here a guide about the best and most common types of locks that conform to the standard, especially those types of door locks home that can be found in home insurance policies.

  1. Mortice Locks
  2. Multi-point Locks
  3. Rim Automatic Deadlatch/ Night Latch

Mortice Locks

A Mortice Lock is one of the most common door lock types you can see in home insurance policies. Mortice Locks include heavy-duty latches that make it popular for their strength and level of security. Consequently, this type of lock mechanism is commonly used not just in homes but also in residential properties in the UK. A mortice lock requires a mortice to be cut into the edge of the door. This mortice or pocket is where the mortice latch will be fitted to.

A popular mortice lock is the 5 Lever Mortice Deadlock which is commonly fitted to wooden doors. It provides a good level of security as it is locked from both the inside and outside with a key. Thus, this type of lock is most commonly used in external doors, particularly the front door and the back door. Mortice deadlocks are not found on doors like the uPVC (Unplasticized Polyvinyl Chloride) & composite doors.

Aside from the 5 Lever Mortice Deadlock, there is also the 3 Lever Mortice Lock. However, this type of lock is less secure since it has fewer levers. Fewer levers mean that there is a high risk of key duplication. Thus,  a 3 Lever Mortice Lock is not approved by the British standard. To be insurance and standard approved, it is best to use the 5 Lever Mortice Deadlock and ensure that it conforms to the current approved British standard.

To identify whether your mortice lock conforms to the standard, the quickest and right way is to look at the faceplate and see if these are engraved: British Standard Kitemark, Number of Lever, and Standard Number. A mortice lock that conforms to the standard is more secure because of its use of hard plates for protection against drilling. If the mortice lock is not standard-approved, the lock is usually fitted with a Nightlatch for added security.

Multi-Point Locks

A multi-point lock is a key operated locking system that is fitted into the body of the door.  It has multiple bolts that will engage to the door frame when the door locks. This locking system is commonly operated with a euro cylinder lock. This lock system is approved as it offers a high level of home security due to the lock bolting the door into the frame. It often has three locking points (sometimes 4 or 5) that simultaneously lock when you turn the key.

You can often find this locking system on uPVC and composite doors, especially on entrance doors. It can also be fitted to other doors like timber and aluminium doors. The multi-point lock is often found on the external front door and external back door. Despite its several locking points, only a single cylinder is required for a multi-point lock. 

However, you must know how the lock is operated the right way to fully lock the door properly. There is a risk that your key may get broken and stuck inside the lock of your uPVC door, so make sure to use it correctly.

Night Latch or Rim Automatic Deadlatch

Another generally approved lock for insurance is the rim automatic deadlatch or night latch. However, this type of lock is not recommended to be the only lock fitted on your door. For extra measure and to double the security, most providers would prefer the rim automatic latch to be mounted with either the mortice lock or the multi-point lock.  Night latch is less secure because it is only mounted on the surface of the front door.

The main difference between a rim lock and a mortice lock is that rim locks are mounted on the surface of the door while mortice locks are mounted within the door edge. Thus, the disadvantage of using rim locks is that it cannot be used and operated alone. Still, rim locks or night latches can be useful in improving security. Night latches can also be easily used as they lock automatically once shutting.

Get Fast-Service Aerial Repairs and CCTV Installations

Other Useful Door Locks

The three previously mentioned lock types are the lock types that are often found in home insurance policies. However, this doesn’t mean that other lock types are not important looking to and should no longer be used. Other products can still be ideal for certain types of doors inside your home. Using other locks can also be good to keep your home safer. Here is a guide about the other categories of locks that can be used to improve the security of your house.

  1. Euro Cylinder Locks
  2. Hand Levers
  3. Barrel Bolt
  4. Chain Lock
  5. Padlock
  6. Electronic Locks

Euro Cylinder Locks

Euro cylinder locks are one of the door lock types that are most commonly found and fitted to modern homes. It is commonly used on doors like uPVC & composite doors. To conform with the standard, euro cylinder locks can be mounted along with either the mortice or multi-point lock. 

Euro cylinders can be used in external and internal doors. A cylinder lock may also be used for internal doors in offices, hospitals, schools, etc. Euro cylinder locks can be both single cylinder and double cylinder in design.

Hand Levers

Hand levers are common options for inside doors such as closets or basement doors. Hand levers come with a simple hand lever or a handle accompanied by a single twist knob. A hand lever is a less secure type of lock, but it allows you to easily open the door. This hand lever may be a big help when you’re carrying many items since you can just push the lever or handle down to open the door.

Barrel Bolt

Barrel bolts come with two main parts: the first one is the one that goes on the door’s frame and the other one that goes on the surface of the door. The barrel bolt is essentially a simple lock on the surface that you can slide to lock the door. This type of lock can easily be installed and can help make your home more secure.

Chain Lock

Similar to the barrel bolt, a chain lock is a type of lock that comes with two parts. These parts connect and lock the door to the frame with a chain. Chain locks are common in hotel doors, but many also use them in their house.  Using chain locks allow you to slightly open the door to see and greet someone outside of the door from the inside of your house while keeping the door locked. The door can only be unlocked once you close the door back and release the chain, allowing you to open the door all the way.

Padlock

A padlock is one of the simplest types of a door lock. These are not ideal to be used for the front door or back door of your home as it is not secure. People use a padlock in locking doors and common areas that do not require that much of security. You can find padlocks in less secure areas like the storage or a shed or in locking doors that are needed to be closed shut.

Electronic Locks

Electronic locks and digital locks are those locks that allow you to secure and lock your door without the need for a single key to open it. Instead of a key, these locks may be unlocked with the use of a smartphone or a number password. Using digital locks, you may also monitor and know who opens the door at a specific time.  Some electronic lock mechanisms can even be operated to assign special privileges or services to family members or other people. These are just some of the many options that may be possible with the use of an electronic lock.

If you’re looking for an emergency locksmith, contact Aerialforce now! We provide same-day emergency response.

Best Budget CCTVs for your Home

cctv

When it comes to your home security, it should be your top priority to ensure that no harm comes your way. Crime rates are steadily increasing and you want to make sure that your house and store are properly secured and ready for any kind of break-ins.

With the help of a security camera, this will give you the best experience in protecting your privacy and safety! However, if you don’t know a thing about CCTV cameras, read our article about the 6 Common Types of CCTVs!

Meanwhile, if you want to find the best CCTV camera at the lowest price, we rounded up the good ones just for you! Here are our top 7 best budget CCTV cameras that only cost under £400! You don’t have to spend a fortune to keep your home and family safe and protected.

  1. Google Nest Cam IQ Outdoor
  2. Arlo Pro 3 Floodlight Cam
  3. Ring Spotlight Cam Battery
  4. Canary Flex HD
  5. Google Nest Cam Indoor
  6. Netatmo Smart Indoor Camera
  7. Arlo Q Plus

Best CCTV installers and Aerial engineers near you

Google Nest Cam IQ Outdoor (£329)

This mighty and smart security camera offers stunning features such as a high-power infrared lens, 360° rotation, 1080p video, weatherproof, and records 24/7 footage! It has a facial recognition feature and can detect and zoom up to 50 feet away with its 4k sensor! The Google Nest Cam IQ Outdoor smoothly works with Alexa or Google Assistant. Additionally, this outdoor security camera can operate at temperatures between -40° to 113° F and work well day or night.

Due to its specs, the installation process can be quite tricky. But if you want a top quality outdoor security camera, we assure you that the Google Nest Cam IQ Outdoor is worth all the effort!

Arlo Pro 3 Floodlight Cam (£260)

The Arlo Pro 3 Floodlight Cam is a sustainable battery-powered outdoor camera that requires no hassle wirings. It includes a reliable built-in alert system, and a powerful integrated floodlight. This home security camera can also record videos during day and night! You are assured of your safety and protection with its high-resolution digital zoom, colour night vision, six months battery life, and a 160° diagonal field of view.

The Arlo Pro 3 Floodlight Camera is also a cost-effective purchase as it has an optional solar panel or Outdoor Charging Cable. With this, you are sure that your floodlight camera will be charged all day long! On another note, the Arlo Pro 3 is also built to resist cold rain and the sun heat.

With Arlo Pro 3’s smart features, it can easily capture and record quality video footage on the outside of your home. This does not only work well with domestic properties but also office and business establishments.

Ring Spotlight Cam Battery (£199)

The Ring Spotlight Cam Battery is a wireless home security outdoor camera with no monthly or yearly subscription. It has a 1080p HD video and image quality, a colour night vision, a field view of 140°, and two-way audio quality. Moreover, it also works with Alexa and Google Assistant! The camera also includes built-in LED light strips and a 110-decibel alarm system. Meanwhile, to store video footage, this outdoor home security camera offers affordable cloud storage packages.

Installing this security camera is quite convenient. All you need to do is download the Ring Always Home app, and there will be an instruction manual for you that you must follow. Moreover, because the Ring Spotlight Cam Battery is wire-free, its rechargeable batteries have a battery life of 6 to 12 months! Lastly, you can also live stream the recording, so you won’t need to worry when leaving your home.

Canary Flex HD (£189)

The Canary Flex HD is a weatherproof HD home security camera known due to its flexibility. It can be used inside or outside your home, and it can operate whether plugged in or wire-free! You don’t need to worry about snaking its 8 ft length power cable because it has a 6700 mAh rechargeable battery.

The Canary Flex HD has a 116° field of view, an HD camera with 1080p video, and motion detection. For its audio, it offers a high-quality microphone, a built-in speaker, and two-way audio. Its night vision is also superb and will automatically switch on. Additionally, you have the choice of whether to get a subscription or not.

With its innovative design, improving your home’s security will become easier, as the Canary Flex HD serves you with adjustable features!

Get Fast-Service Aerial Repairs and CCTV Installations

Google Nest Cam Indoor (£159)

The Google Nest Cam Indoor is a dependable home security camera that alerts your smartphone, smartwatch, and email when it detects noise and motion. With its good image quality, two-way audio, and compatibility with Google Assistant and Amazon Alexa, this CCTV camera earns its place to belong in our list of best cheap home security cameras!

However, unlike its outdoor version, this security camera only has a 130° wide angle. As for video storage, they do not have a slot for a Micro SD Card and will require you to pay a subscription for cloud storage. Despite this, there is no need for you to feel uncomfortable in your home because the Google Nest Cam Indoor secures and encrypts your private content with an advanced security system.

Netatmo Smart Indoor Camera (£150)

The Netatmo Smart Indoor Camera is one of the most inexpensive indoor cameras. This gold aluminium tube is also recognised due to its sleek and minimal metallic appearance that fits perfectly to any interior design. It also has the feature for facial recognition and alerts your smartphone when a home intruder has been detected. 

Setting this up won’t take you a lot of time since you only need to plug it in, download the Netatmo Security App, create a Netatmo account or log in to an existing one, and follow the instructions afterwards.

Additionally, it also highlights the privacy of your family by keeping them off the record, unlike other smart security cameras that continuously film everything. Video storage is also flexible as you have the choice whether to store it automatically on your Dropbox cloud storage or backup your videos on your FTP server.

Despite its minimalist design, its feature includes an extensive 130° field of view, indoor siren, full HD videos, door or window sensors, and superior night vision.

Arlo Q Plus (£149)

Arlo Q Plus is a decent indoor security camera that is portable and compact. It can continuously record videos and has two-way audio. With a wide-angle 130° field of view, you are sure to be alerted when there is any noise or movement under its coverage. If you wish to connect it with Amazon Alexa, Google Assistant, or IFTTT & Stringify, Arlo Q Plus can work well with these AI technologies.

With Arlo Q Plus, you have the control and option to record your home 24/7 or not. The recording of your CCTV can be saved through your micro SD card local backup storage to secure the footages. Additionally, the video quality of Arlo can go up to 1080p, and it also has a night vision!

If you wish to install your CCTV camera efficiently, it is best to have a professional do it instead of DIY-ing your CCTV installation. With that in mind, Aerialforce can guarantee to assist you in setting up your home security camera!

Ready to book our services? Contact us at 0330 173 1924, or message us online!

What’s The Best Night Vision CCTV Camera?

security cctv

Surveillance cameras are vital equipment that allows you to monitor your home or shop day and night. As technology advances, so too does the features of these security cameras! Modern CCTV cameras now include a Wi-Fi enabled system, motion detection, wireless cable, 1080p full HD quality video, built-in LED light, and of course, infrared night vision. Night vision cameras are something to look forward to as it is best for outdoor surveillance. Besides, since a lot of suspicious activities usually happen at dusk, you won’t need to feel uneasy because security cameras with night vision will capture and record any strange movements and noises at night.

Additionally, what’s excellent about CCTV cameras is that you can easily connect it to your television in full HD! This way, you can monitor what is going on outside your home on a larger screen, making it way easier to detect suspicious activity in your property.

Are you planning to buy a night vision security camera for your home or shop? Read ahead to find out top 5 night vision security cameras that you can choose from! These products are our best choices of night vision cameras, that we believe suits any household, or businesses.

Best CCTV installers and Aerial engineers near you

Arlo Ultra

The Arlo Ultra is a conventional wireless night vision camera that provides multiple useful features to protect and enhance your security. You can see the complete set of your property due to its 180° viewing angle, de-warping simulation, and 4K HD resolution with HDR! It also has a digital zoom that allows you to see important details such as license plate, logos, and even words. Whether you use it for indoor or outdoor security, its performance won’t be compromised.

At night, you are ensured that you are safe and alert as it has an integrated spotlight that enhances the colour night vision feature of Arlo Ultra. Meanwhile, you can disable the lights and have the infrared LED light for black and white night vision. However, the colour night vision is better compared to the traditional black and white image and video quality as it is more clear. The Arlo Ultra also has a Wi-Fi enabled system and works with your Apple Watch, Google Home Hub, and Amazon Alexa. Installing this CCTV camera won’t take too much of your time because it has no complicated wirings!

Lorex 4K Nocturnal Smart IP Camera

The Lorex 4K Nocturnal Smart IP Camera offers infrared LED lights with up to 130 feet range of infrared and colour night vision. When it comes to its audio and image quality, it includes a 4K HD resolution with HDR, listen-in audio monitoring, and a 111 ° viewing angle. However, since it is an IP camera, it needs an NVR to store video footage, and record videos without paying monthly subscription fees for cloud storage. This CCTV camera also provides a privacy-masking feature that gives you control on what areas you don’t want to capture.

Additionally, with the Lorex NVR, this home security camera will be able to gain features of smart detection technology to identify people and vehicles. The Lorex 4K Nocturnal Smart IP Camera is also weatherproof, and it includes a heavy-duty aluminium exterior that ensures long-lasting performance for outdoor use. 

Hive View Outdoor Camera

The Hive View Outdoor camera provides a high-resolution video quality, listen-in audio monitoring, and has a digital zoom up to 8x. If you wish to live stream, this security camera will give you a clear 1080p full HD video, and a viewing angle of 130°. For Hive View Outdoor Camera’s night vision, it can reach up to 15 feet away, while for its day time vision, it can reach up to 60 feet away. This security camera will automatically record once it detects people, noise, or any motion, ensuring the safety of your property day and night!

Meanwhile, if it captures any suspicious movement or noise, it will notify your smartphone or email. You can also adjust its alert sensitivity settings to avoid unnecessary report messages. No need to worry about your privacy because all your camera footage is encrypted and stored securely in the cloud storage! Since it will be used outdoors, the Hive View Outdoor Camera has an IP66 weatherproof rating and can endure rain, dust, and temperature ranging from -20°C to +45°C.

Get Fast-Service Aerial Repairs and CCTV Installations

Blink XT2

The Blink XT2 is a great choice of infrared night vision CCTV camera. It can be for indoor or outdoor use and has a field of view of 110°. This home security camera is compatible with smart integration platforms like Amazon Alexa voice control, and IFTTT, and is also weatherproof. Moreover, Blink XT2 is a wireless home security camera that is powered by batteries that can last up to 2 years! 

It has a motion sensor, live viewing, mic for two-way talk, free cloud storage, 1080p image quality, Wi-Fi enabled system and one-directional microphone. Also, the appearance of the Blink XT2 is discrete and minimalistic. Since it is a battery-powered outdoor security camera, installing this will only take you a few minutes! The Blink XT2 is also the top customer’s choice due to its affordable price, and easy installation process.

Logitech Circle 2 (wireless)

The Logitech Circle 2 is a waterproof CCTV camera that can be wired or wireless. It is the best versatile home security camera that can be used for indoor and outdoor surveillance. The video quality of Logitech Circle 2 extends to 1080p HD resolution, has a digital zoom and a diagonal viewing angle of 180° with a reliable infrared night vision that clears up to 15 feet away! It also has a built-in speaker, two-way audio, high quality exterior and adjustable pan and tilt. Since it is the wireless version, this Logitech Circle 2 has a rechargeable 6400 mAh Li-ion battery.

If you want to set it up on your mobile, you can download the Circle mobile app and even customise the alert sensitivity! Meanwhile, it works well with Apple HomeKit, Google Assistant, and Chromecast devices if you wish to live stream or manage your smart home. It even has a smart location feature that automatically stops recording videos when it detects that you have arrived home through your phone’s GPS.

Night vision security cameras are reliable to use, especially at dusk. With their high-resolution video quality and alert systems, your home will be safe from intruders day and night! If you want to buy and install a night vision security camera for your home, the professional CCTV engineers of Aerialforce are the right people to assist you! You can choose which outdoor CCTV products that work for you, and our team will do the rest.

Besides, other than CCTV installations, Aerialforce also offers TV Aerial maintenance, locksmith services, and Satellite repairs. If you wish to avail our services, you can reach out to our customer service or book us online!

What Is A Sky single feed mode?

Sky Remote

There are many types of home entertainment systems that are available in-store for customers with different demands. An average house would set up a hard-wired internet connection, pay for aerial installation services. If you are on a budget, having a TV service installed may be the most affordable entertainment set up.

Installing an entertainment system to your home is one of the many ways to be able to relax and enjoy at your own pace! Whether it’s to share a moment with your family or friends after a long day of work, or binge-watch the recordings of your favourite show alone, you will be pleased to use a well-functioning home entertainment system with Sky!

As you choose to have a Sky+ HD box at your flat, there are just some things that you should know and understand when you will only have one single cable to your Sky+ HD box.

  1. What is a Sky Single Feed Mode?
  2. How Do I Change My Sky Box To Single Feed Mode?
  3. Can I connect my Sky box to my home WiFi?

Best CCTV installers and Aerial engineers near you

What is a Sky single feed mode?

Standard Sky boxes usually function using two cable feeds coming directly from your satellite dish. With this, it will allow you to watch a show, and record another one simultaneously. However, some circumstances may not be possible to get a second cable feeding into your Sky+ HD box.

This is where the Sky Single Feed Mode option enters the topic. The Sky Single Feed Mode is one of Sky’s latest updated features on their new Sky+ HD DigiBoxes. It’s a setting on your Sky box that should be set so your leisure time won’t be interrupted with sudden technical issues, or screen error messages. That being said, when you connect your satellite PVR with only one cable, you would not be able to record one program and watch another, or record two programs simultaneously.

The Single Feed Mode is highly useful for communal satellite installation since it can be impossible to have a second cable feeding your Sky+ HD box. It should also be noted the Single Feed Mode option only works for Sky+ HD Box, and not for Sky+ Box. 

How do I change my Sky box to single feed mode?

Here are the simple steps to set your Sky+ HD Box to single feed mode without the help from your technician:

  1. Your Sky cable must be plugged into Dish Input 1, and not Dish Input 2.
  2. Click the ‘Services’ button on your Sky remote control.
  3. On the ‘Services’ screen, press 0, 0, 1, and then press ‘Select‘ button onto your remote control. Doing this will open your Sky installer Menu on the Sky+ HD box.
  4. Once the Sky Installer Menu opens, go to ‘Setup’ and scroll down to ‘Single Feed Mode’ and switch it from ‘Off‘ to ‘On’ and click the green button on your remote control to save the settings.
  5. A warning message will pop out from your screen that will tell you that you are changing to Single Feed Mode.
  6. Press the green button and ‘Select‘ on your Sky remote control to continue.
  7. Just wait for a few minutes as your Sky box restarts. Once done, the single feed mode will now be activated for your use.

Additionally, if you wish to connect a second satellite signal to the Sky box, follow the reversed process above to turn off the single feed mode again.

Get Fast-Service Aerial Repairs and CCTV Installations

Can I Connect my Sky Box to the Internet?

Of course! You can either connect your Sky box through a wired connection, or a wireless connection.

Wired connection:

  1. Using the Ethernet cable, plug one end of its end into the Ethernet port behind your Sky box.
  2. Then, plug the other end of the Ethernet cable into one of the available ports behind your router.
  3. After these two simple steps, your Sky box will now be connected to your chosen broadband.

Also, the Wired Connection is a more recommended way of connecting your Sky box to the internet to ensure that your network connection will be faster and stronger.

Wireless Connection:

For Wireless Connection, you can either connect using the WPS buttons or by using your WiFi password.

When connecting with WPS:

  1. Hold and press the WPS button of your router until it flashes, then quickly click on the WPS button on your Sky box.
  2. The wireless light on your Sky box will flash then will turn into a solid amber colour once you are finally connected.

When connecting with WiFi Password:

  1. Press ‘Services’ on your sky remote then select Settings, and under Settings, choose Network.
  2. Click the Connect with Password option, and choose the WiFi Network and input your password.
  3. Once done, your Sky box will now be connected to the internet.

Have other problems? Aerialforce can assist you!

If you have other concerns about your home entertainment system, reach out to us at Aerialforce so we can give you a hand! Other than TV Aerial maintenance and installations, we also provide CCTV, locksmith, and satellite services. With us, you don’t have to worry about any of your appliances. Call us on 0330 173 8667 or book our services online if you wish to reach out to us.

How To Change A Door Lock

lock

You can’t just deal with broken door locks as if it’s just nothing. In this article, we will discuss how to change a door lock.

  1. Replacing Door Locks vs Changing Key Locks
  2. Replacing Door Locks
  3. Reconfiguring Key Locks

Improving your house security is not easy. Aerialforce makes it their top priority to assist you in making your home or establishment 100% safe and sound.  Some of the reasons why you want to change your lock include:

  • You lost your keys 
  • You moved into a new home
  • Your lock has been faulty and has become unreliable to ensure security
  • You plan to upgrade your locks with a more enhanced security
  • You got your key stuck inside your lock 

Whether your reason to replace locks is listed above, or not, we can help you secure your home or office with just a few steps! But before we get started, you need to understand the difference between replacing door locks and changing keys.

Best Emergency Locksmith Near You

Improving your house security is not easy. Aerialforce makes it their top priority to assist you in making your home or establishment 100% safe and sound.  Some of the reasons why you want to change your lock include:

  • You lost your keys 
  • You moved into a new home
  • Your lock has been faulty and has become unreliable to ensure security
  • You plan to upgrade your locks with a more enhanced security
  • You got your key stuck inside your lock 

Whether your reason to replace locks is listed above, or not, we can help you secure your home or office with just a few steps! But before we get started, you need to understand the difference between replacing door locks and changing keys.

REPLACING DOOR LOCKS VS CHANGING KEY LOCKS

Replacing a Door lock

When you ought to replace door locks, this involves dislodging the original lock from the door (together with the handle if it comes with it) and then inserting a new door lock that you have chosen.

Reconfiguring a Key Lock

Meanwhile, when you reconfigure key locks, this process rearranges the inner springs and pins of the lock to match it with a new key. Residential compounds notably use this process as it is more convenient and less expensive compared to replacing the entire door lock.

Once you have come to terms with the difference of replacing a door lock and reconfiguring a key lock, we can now begin!

REPLACING A DOOR LOCK

Steps:

  1. First, measure your last door lock with a tape measure before you buy a new replacement so it will fit in the hole.
  2. Leave the door open before you unscrew the screws from the last lock of the door. As you slowly loosen the screws, remove the interior and exterior plates on each side (if possible) by carefully pulling it off.
  3. Once you have loosened the screws, insert your key. Turn it until you can now gently withdraw it together with the key.
  4. Next, try to fit the new lock into the existing hole where you removed the previous lock. Once done, insert your key inside the keyhole. Turn it left and right before you can finally screw the lock tightly into the door again. Don’t forget to place the interior and exterior plates on each side as well!
  5. As for the last step, you can now check if the lock works fine by turning the key to see if the screw is tightly done, and the bolt is attached correctly. Check the handle or knob as well, so you are sure that the newly installed cylinder lock is tightened and ready to use. Cylinder locks are also known as a pin tumbler.

Connect with the best local Locksmiths

RECONFIGURING KEY LOCKS

Whether it’s a mortice, euro cylinder lock, a rim cylinder lock, or a UPVC lock, many establishments need to reconfigure the pins and springs of the lock for new tenants or office officials. So, to help you out, here are the steps that you must follow to rekey your locks successfully!

But first, buy a re-keying kit with the same brand of the lock in your doors and keys. This product can be easily bought in the hardware store, supermarket, or even online.

Steps:

  1. Once you have your rekeying kit with you, you can now officially start. Insert the key into the keyhole, and turn it to unlock the door. Then, thrust the wire-like tool to the small hole on the side of the knob. As you do so, this wire-like tool pushed at the side of the knob will quickly release the knobs and will let you pull it out of the lock.
  2. After you take out the exterior lock face, check the inside of the knob for any small pieces of metal or plastic that attach the cylinder lock where it belongs. If there are any small pieces of plastic or metal, take it away and put force on the key that is still inside the keyhole for the cylinder to spring out at the back of the knob.
  3. Inside your rekeying kit, there will be a tool similar to a wrench. Apply that to take out the cylinder retainer ring that protects the cylinder housing. Press the wrench-like tool against the cylinder retainer ring to have it jump off the cylinder.
  4. This next step can be quite tricky since you will need to put out the cylinder plug from the cylinder. What you will need to is the tube-shaped tool in your rekeying kit that you will use to slide the cylinder plug out of the cylinder housing. Push the tube-shaped tool from the side opposite the keyhole for the plug to jump out. Ensure to keep constant pressure between the plug and follower for the pins and springs not to jump off.
  5. Put away the old pins from the cylinder plug by either turning the plug over to empty the pins or by plucking them out with very tiny tweezers that are part of your kit. If you don’t know how to take out the old pins with the tweezers, check out the instructions in your equipment kit!
  6. After putting away the old pins, use the tweezers to match the new pins according to the instruction sheet, and insert your key to the keyhole as well.
  7. Finally, once the pins are installed, reverse the steps instructed above to reassemble your lock.

Looking for a professional emergency locksmith? Contact Aerialforce at 0330 173 1355 now!

How To Set Up A Hard-Wired Internet Connection

Internet modem

No one can deny the power and convenience of Wi-Fi. Whether you are emailing in the study or scrolling through social media in the bathroom–your device is connected just about anywhere you go. However, while you can browse with ease, your wireless network can be very finicky. 

Signal interference, poor weather, and multiple users can create lag. When you are playing a ranked game, talking in a video meeting, or submitting an important document for school or work, sometimes Wi-Fi just won’t cut it. Its unreliability, weak signal strength, and slow internet speed are a thing of nightmares. 

Switching to a wired connection may seem old-fashioned, but it ticks off all the boxes Wi-Fi fails to achieve. If you want a stable, fast, and secure internet connection–you need to make the switch. It doesn’t have to be a full switch as Wi-Fi’s convenience is definitely undeniable. Instead, connect your devices that’s stuck in place i.e. desktops and smart TVs with a wire and use Wi-Fi for your other devices.

Aerialforce answers frequently asked questions about wired internet connection, including a step-by-step guide on setting it up.

What Is A Hard-Wired Network?

A hard-wired network is the complete opposite of Wi-Fi. Instead of being able to access the internet with a wireless signal, you need to find an access point to connect to the internet. You can make this happen by creating a wired network with ethernet cables and ports. 

Ethernet Vs Internet

Now, what is the difference between ethernet and internet? The internet is a global connection to other networks (WAN). While ethernet is purely local (LAN), it is your connection to other devices within an area. 

Everything you see online is all thanks to your internet connection. Ethernet, on the other hand, plays the quiet and albeit unassuming role of linking your router to your switch, computer, and game console or your computer to your printer. Despite their similar-sounding names, they are completely different.

Best CCTV installers and Aerial engineers near you

How To Set Up A Wired Connection

Materials and Tools

When you want to create a wired network in your home or business, you need to gather the following items:

  • Router
  • Switch (optional)
  • Ethernet cables (Cat 5, Cat 5e, Cat 6, Cat 6a, Cat 7, or Cat 8 w/ RJ45 connector)
  • Powerline adapters (optional)
  • Ethernet sockets (optional)
  • Drill
  • Handsaw

Depending on how you want to route your cables, you may also need a baseboard cord channel, cable staples, and tape. 

What Do You Want To Achieve?

When you properly plan your wired network, you won’t notice the “decrease” in coverage. Get a rough sketch of your flat and figure out which rooms need internet access. You can target specific places like the bedroom, home office/study, and dining/living area and add an internet port in each one. If you are sharing your flat, you can also add multiple access points in the common area. 

After you identify the areas that need the internet, figure out how you are going to connect each room to your router. A router usually has 4 ethernet ports. In small flats and houses, this is more than enough to create an excellent wired connection. However, if you need more access points, you can expand your range

A switch is like an extension cord but for your internet connection. Switch models may vary, but they usually offer 4 additional ethernet ports. If you want to set up multiple access points in one room or cater to multiple rooms, a switch can make it happen! 

Create A Plan

Measure the distance between your router and each internet access point. The maximum length of an ethernet cable is at 100 meters, so work within that range. With strategic switches, you can wire your entire home if you want to.

When you get the numbers, figure out the best path for your ethernet cables. People who live in one-storey homes should have no problem with this. However, households with multiple floors might need more switches and ethernet cables to make it work. 

You can spend days figuring out how to get your internet connection to another floor. Most people simply opt to keep their “internet zone” in one area. If you don’t want to deal with cables going to another level, you can opt for a powerline adapter instead. 

Powerline adapters use the existing electrical wiring to send your internet connection to different parts of the house. It may look wireless, but it still uses ethernet connections. It simply skips the tricky placement of wired connections that go up and down the stairs. As long as you have an electrical socket by your desk, you can get your internet in your room. 

With powerline adapters, there is little to no DIY work involved. You may want to look into tape or cable staples to keep your area neat, but it should be good to go. The only downside is that your wired internet connection might be slow.

Get Fast-Service Aerial Repairs and CCTV Installations

Wire Your Home

Homeowners can either DIY or commission tradesmen to create paths for the ethernet cable through the drywall. You need to get a drill and handsaw to make the holes for your ethernet cable. To keep it neat, use a plastic grommet or an ethernet socket

If you rent a flat or you don’t want to drill any holes, there are several solutions you can try. The first is running your cables through a round baseboard cord channel. It is an easy way to keep your wires from looking too messy. 

The second is using cable staples. While you may need to drill to install them, it is nothing compared to the work and mess of the first option. Space out your cable staples and run your ethernet cable through them. Make sure you put them close to the floor or the ceiling, so it does not affect your decor. 

The third solution is to use powerline adapters. All you need to do is keep your ethernet cable nice and neat with cable staples or tape. If you cannot block off one weekend to wire your home, powerline adapters are an excellent timesaver. 

The fourth is running your ethernet cable through the vents. With a bit of fishing wire, you can work the cable around your house. While this is the most creative solution, it isn’t ideal. You may run into issues, especially when the heating is on. 

If you want to hide your wires you can get other ideas here: How to Hide TV Wires

How To Connect To Your Ethernet

With everything in place, connect one end of the LAN cable to the ethernet port in your modem/router. Then connect the other end to the ethernet port in your device. If the light on your router is green, you should be ready to go. 

If you have issues with your wired internet, try following the troubleshooting suggestions from your service provider. They usually advise you to restart your router and try again. The “turn it on and off” method may seem simple, but it works most of the time. 

When the problem persists, it can be split between a hardware issue or a service provider one. Hardware issues can be a loose cable, faulty router, or any other damaged device. If you have a product warranty, send those devices back and get a replacement. However, if it is a service provider issue like no internet connection, then there is little you can do. You can try to contact them and ask about when you can get your wired internet connection back. 

The toughest part of getting a hard-wired internet connection is dealing with all the cables. When you manage to finish your set up, you can connect to just about any device with no problem. You and family can enjoy faster internet speeds with a wired connection. It can improve your productivity when you work from home and upgrade your home entertainment system as well!

Switching to wired internet is one of the best decisions you can make. With your improved connection speed, you can say goodbye to lags in online games and buffer times when you stream videos and movies. You can attend online meetings without worrying about your internet connection disappearing now and then. With wired internet, downloading and uploading large files takes no time at all. When you adjust to the new system, everyone wins!

If you are looking for other ways to improve your home entertainment system, Aerialforce is a nationwide provider of TV aerial, CCTV, and satellite services. You can call us at 0330 173 8667 or book our services online!

Cost of Aerial Installation in Glasgow

Aerial installation

Every home entertainment system starts by identifying how you are going to use it in the future. Planning on movie night with family and friends? Catching-up on the latest game with your best mates? Binge-watching reruns of your favourite shows? What you choose to do with your digital TV will determine your setup. 

If you are looking for affordable entertainment, nothing is more budget-friendly than TV aerials. You can enjoy Freeview and access hundreds of thousands of hours of FREE TV shows and movies. All you need is a Freeview aerial installed.

TV aerials tend to be customised according to your home’s needs, much less your city or town. So installations in London will be very different from the ones in Glasgow. Having an idea about how much your TV aerial installation costs can help you narrow down your potential technicians and work with the ones that give you the best value for your money.

How Much Does It Cost To Have A Freeview Aerial Installed In Glasgow?

The cost of an aerial installation in Glasgow is around £60-£200 for indoor aerials and £85-£220 for outdoor aerials. And the rate for a technician, during working hours, is around £50-£150. The rate accounts for their time, skills, tools, and commute. Two of the main factors that affect it are time and complexity. 

If your job takes up more than 2-4 hours, you may need to pay the higher end of the range since their hourly rate adds up. If you want more than one TV access point, that affects the price as well. It calls for more parts and custom work. Not all homes are made the same, so your installers will have to figure out a plan on the spot. 

The rest of the bill accounts for materials like the TV aerial, coaxial cable, amplifier, splitter, mount, etc. These vary according to how many access points you need. When you only need one access point, you only have to consider the TV aerial price. For a more comprehensive list, you can consult the table below:

Type of Aerial

Cost 

Indoor Aerial 

£10-£40

Outdoor Aerial

£35-£50

*The prices here are taken from Currys PC World, and they are subject to change. For an exact quote, always contact a sales representative or customer service.

Best CCTV installers and Aerial engineers near you

How Much Does It Cost To Install A Roof Aerial In Glasgow?

Glasgow is considered a hilly city, so outdoor aerials are a popular choice. You can pick between two different types, a wall-mounted or a roof-mounted aerial. A wall-mounted unit is installed on the side of your exterior wall. It is the easier and safer option between the two because all you need is a ladder and even ground. Your technician doesn’t have to worry about falling over, and can focus on the TV aerial installation.

A roof-mounted aerial, on the other hand, can be dangerous. Even the most experienced technicians can have problems if the environment is not right, with pitched roofs being especially difficult. Should they lose their balance or have a weak grip, it can lead to a horrible accident. However, it is one of the best ways to get a digital TV signal. 

While a wall-mounted aerial can get rid of the interference from signals inside the house and layers of brick and concrete, there is a high chance of interference and obstruction from other sources. Trees, posts, buildings, houses, passing cars, radios all affect your TV signal. Given its position, a rooftop aerial doesn’t experience this type of interference as much. Besides taller buildings and passing birds, not much will obstruct your TV signal.

Considering all those factors, the final price of a rooftop aerial in Glasgow should be around £200. If you need more access points or have other complications, it can go upwards to £250-£300. 

What Affects The Price of An Aerial Installation In Glasgow?

There are 3 things that affect the price of aerial installations in Glasgow:

  • Location and Terrain

Glasgow is a major city in the north and is the 3rd most populous area in the UK. There is bound to be plenty of obstruction from other buildings and homes. The terrain is not the easiest to work with either. The uneven landscape creates more obstructions for the nearby TV transmitters. Since the location and terrain presents a challenge, technicians have to put more care into the antenna’s position and angle.

  • TV Aerials

Not all TV aerials are created or priced equally. Indoor vs outdoor, short-range vs long-range, brand a vs brand b, model x vs model y–each category can increase or decrease the unit’s total price. Most homes in Glasgow may have to settle for a long-range, outdoor aerial, and that can be pricey. 

If you have never bought an antenna before, learn how to navigate the different options available with our blog: A Comprehensive Guide for TV Antennas

  • Aerial Installer

The next thing to consider is your aerial installer. In such a crowded place like Glasgow, you are sure to find all kinds of companies and freelancers. You can find an aerial installer at any price point, but you can’t always account for their quality. 

There are two ways you can get an expensive installer–based on their experience or their company. The first is pretty self-explanatory–the more experience they have, the better they are, the higher their hourly rate. People want hassle-free jobs, with quick solutions and service. You may have to pay the premium, but if it means a job well done, why not right? 

The second is based on the company. Their size, VAT-registration, and type of company may affect the prices of each job. If they are small and not VAT-registered, their rates may be cheaper, but they do not have the same-level of self-preservation nation-wide companies have. Since these large companies have more to lose, you are likely to get more consistent service with experienced technicians at a higher price point.

Considering these 3 factors, the cost of installing an aerial in Glasgow might match the prices in London, despite everything else being cheaper. The uneven terrain, outdoor aerials, and emphasis on experienced aerial installers all contribute to this. Glasgow calls for top of the line aerials and technicians to ensure that locals can get decent TV reception. At the end of the day, you have to see this as an investment. When done right, you can enjoy free TV for days on end!

How To Decide On An Aerial Installation Service

When you compare different companies in Glasgow, pay attention to their services, track record, quote, and reviews. Use these criteria to compare different companies in the city until you settle on the best one. 

If you are unsure about who to work with, consider Aerialforce. Aerialforce is a nation-wide service that offers aerial installations and repair services along with TV wall-mounting. If you just moved to Glasgow and are looking for the complete package, Aerialforce can have your TV aerial installation along with your TV wall-mounting on the same day. You can book our services online or call us on 0330 173 8058!

Get Fast-Service Aerial Repairs and CCTV Installations